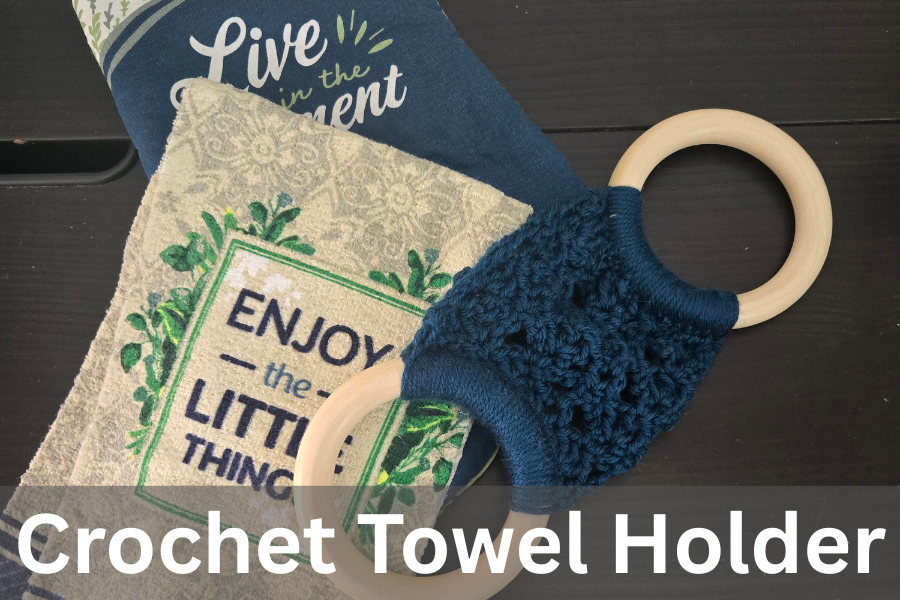
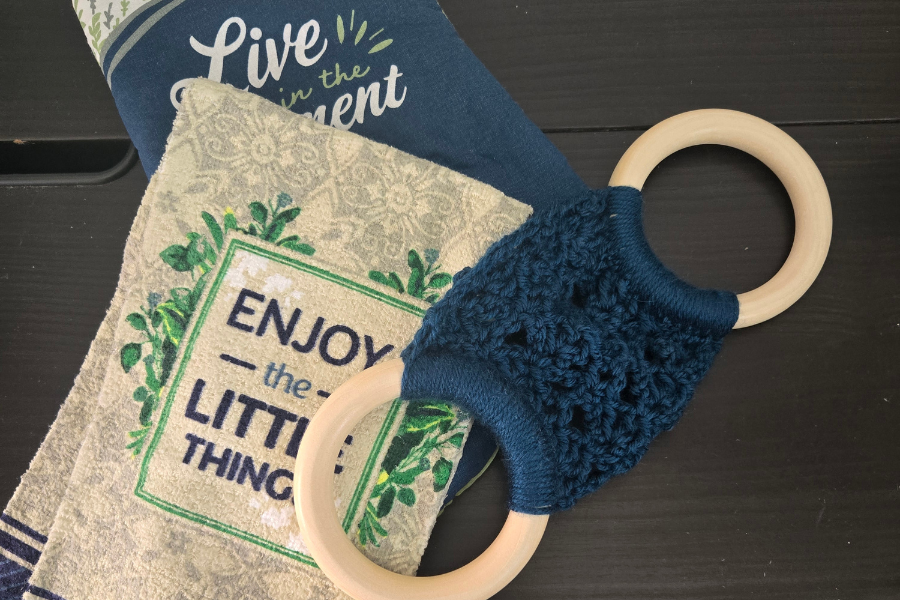
There is something so comforting and cozy about being able to make things for our homes. With just a ball of yarn and a hook, the possibilities of kitschy, charming touches to our homes are positively endless. Today, I’ve made a crochet towel holder.
This crochet towel holder incorporates the beautiful open shell and picot stitch to create the towel holder. I love any stitch that has a more open, lacy weave, and I can’t wait to share this pattern with you!
This pattern works up quickly, making it the perfect project to add a quick, homey touch to your kitchen or for gift giving, and I just love the comfy, cozy feel it brings to the kitchen.
Happy wishes and cozy stitches!
My patterns and pictures are for PERSONAL USE only. Please do not share, distribute, reproduce, publish, translate, alter, or resell this pattern in any way. Feel free to share or sell the finished product as long as you credit my design. Please share photos of your design with me by tagging me here on Instagram if you’d like. I love to see them!
Now, let’s get started!
This post is for a free crochet towel holder pattern.
Free Crochet Towel Holder Pattern
Supplies You Will Need:
Crochet hook: 5.00 mm
Worsted weight yarn in any color(s) you choose
4 ” wooden rings (I found mine on Amazon)
Yarn needle
Stitch marker
Scissors
Crochet Abbreviations:
Inc- Increase
Dec- Decrease
Ch- Chain
Sc- Single Crochet
St(s)- Stitch(es)
Sl st- Slip Stitch
FO- Fasten Off
Dc- Double Crochet
Tr- Treble Crochet
Towel Holder
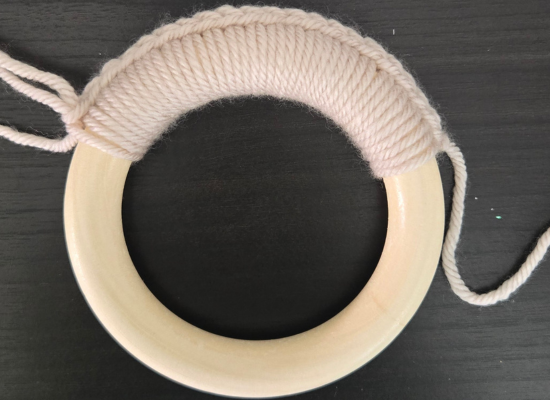
1. Sc 21 stitches around the wooden ring. Ch 1 and turn.
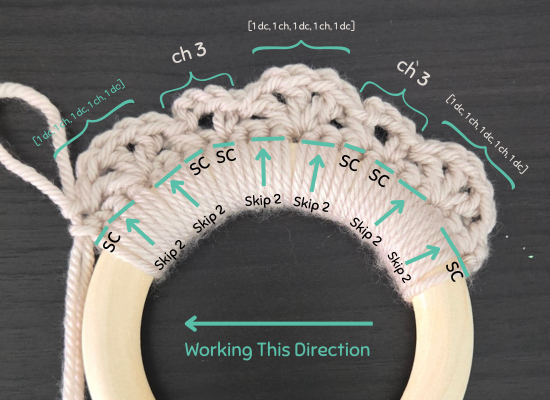
2. Sc in first stitch, *skip 2 sc, [1 dc, ch 1, 1 dc, ch 1, 1 dc] in next sc, skip 2 sc, 1 sc in next st, ch 3, 1 sc in next st**.
Repeat from * to ** one more time, then: skip 2 sc, [1 dc, ch 1, 1 dc, ch 1, 1 dc] in next st, skip 2 sc, sc in last stitch, turn
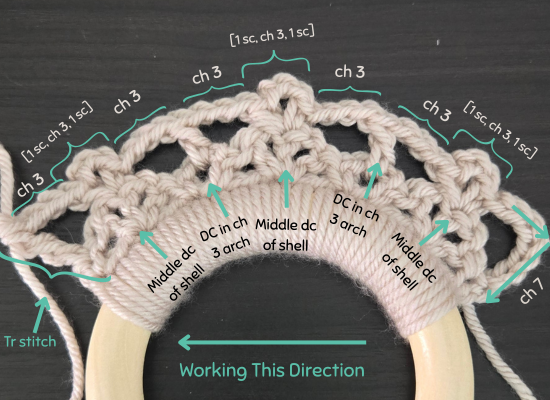
3. Ch 7 (this will count as a tr and 3 ch), *[1sc, ch 3, 1 sc] in middle dc of shell (this is one picot stitch), ch 3, 1 dc in next ch 3 arch, ch 3**.
Repeat from * to ** once more, then: [1 sc, ch 3, 1 sc] (picot) in middle dc of next shell, ch 3, skip next dc, tr in last stitch, turn
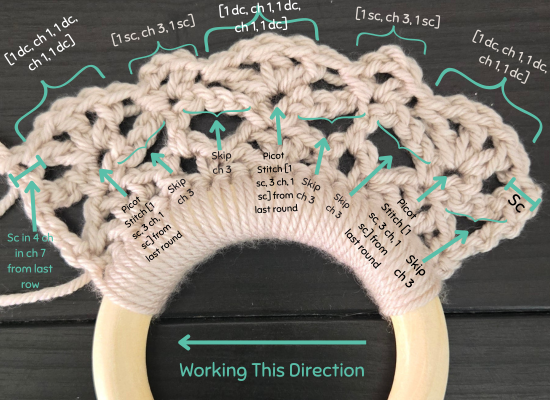
4. Ch 1, 1 sc in tr, *skip next ch 3 space, [1dc, ch 1, 1 dc, ch 1, 1 dc] in center of next picot stitch, skip next ch 3 space, [1 sc, ch 3, 1 sc] (picot) in next dc**
Repeat from * to ** once more, then: skip next ch 3 space, [1 dc, ch 1, 1 dc, ch 1, 1 dc] in next picot stitch, sc in 4th ch of the ch 7, turn
Basically, we are now going to repeat Row 3 and 4 until we reach the desired length. This stitch seems more confusing than it is, I promise! Once you grasp these two steps, you will master this stitch in no time.
5. Repeat Row 3
6. Repeat Row 4
7. Repeat Row 3
8. Repeat Row 4
You can make the length as long or as short as you like. If you’d like to make your towel holder longer, continue alternating repeat rows of 3 and 4 until you reach the desired length. Be sure to end on a “Row 4” repeat to keep the finished folded length even.
Finishing Up:
Now, we just need to sew the other end of our crochet towel holder to the second wooden ring!
Cut a length of yarn that is at least 30 inches in length and pull the last stitch of the last round through to secure.
With a yarn needle, wrap the yarn around the wooden ring, and pass it through each stitch along the last row. Keep the stitches around the ring tidy and pulled tightly as you work.
Weave in all loose ends
And there we have it! A super simple, super customizable and versatile crochet towel holder! Wrap it around your fridge handle, your oven, a towel rack, or whatever!
I love the lacy, cottage look of the open shell and picot stitch, and I love the touch it brings to my kitchen. I’ll definitely be making some of these as gifts as well!
What about you? Have you made one of these crochet towel holders? Share below!
And stay cozy,
This post was for a free crochet towel holder pattern.
Check out my related posts below for more crochet home decor!
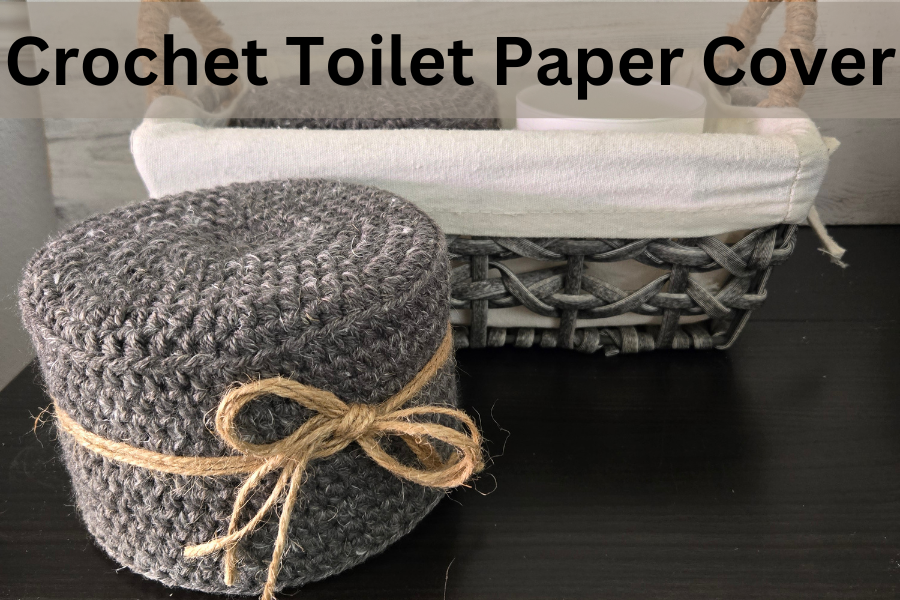
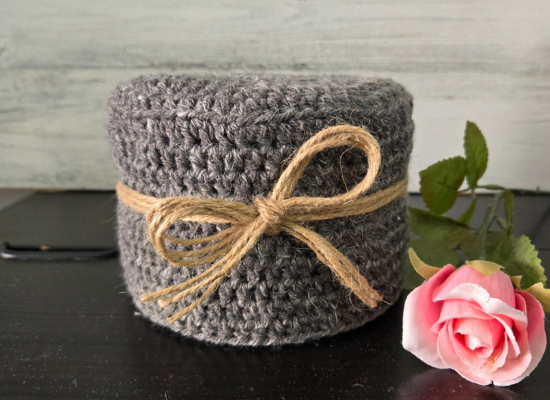
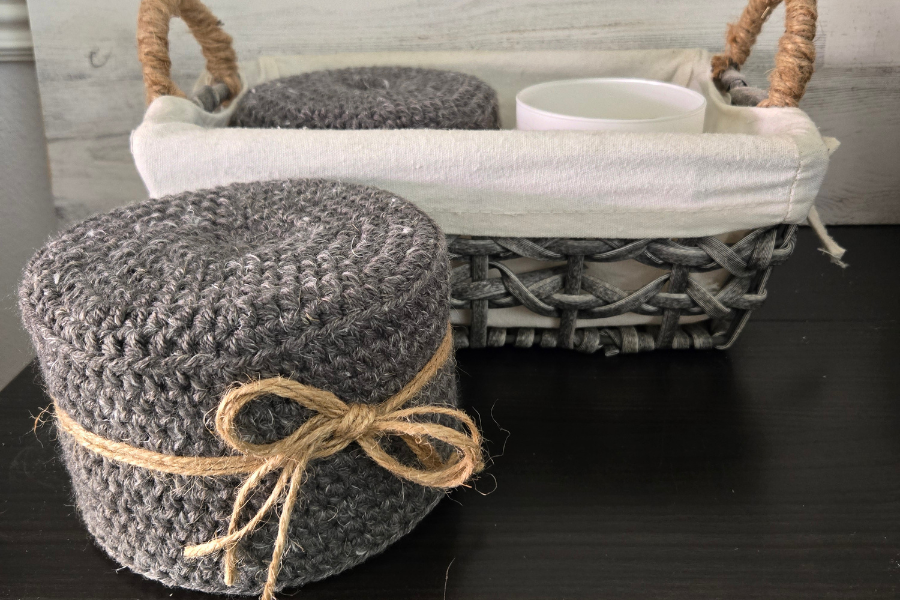
Back in the day, it seemed that everyone and their grandmother had a crochet toilet paper holder. While you don’t see them much these days, they can still bring a coziness to your bathroom! Elevate your bathroom decor with this rustic crochet toilet paper cover pattern.
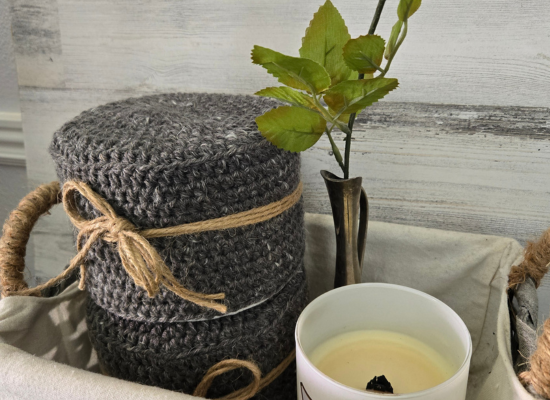
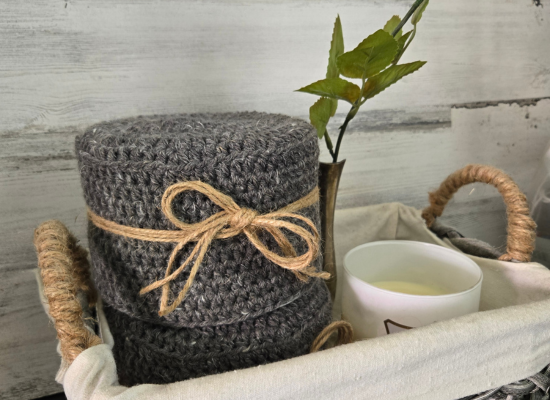
I love the touch of farmhouse coziness this simple crochet toilet paper cover brings to the bathroom! This simple yet stylish project is the perfect way to add a handmade accent to your decor. It’s the little things that bring such warmth and coziness to our lives. As they say, life is lived in the details! Read on for the free crochet pattern.
Happy wishes and cozy stitches!
My free patterns and pictures are for PERSONAL USE only. Please do not share, distribute, reproduce, publish, translate, alter, or resell this pattern in any way. Feel free to share or sell the finished product as long as you credit my design. Please share photos of your design with me by tagging me here on Instagram if you’d like; I love to see them!
Now, let’s get started!
This post is for a crochet toilet paper cover.
Rustic Crochet Toilet Paper Cover: Free Pattern!
Supplies You Will Need:
Crochet hook: 5 mm
Worsted weight yarn in any color(s) you choose
Yarn needle
Stitch marker
Scissors
Twine
Fabric glue (optional)
Crochet Abbreviations:
MR- Magic Ring
Inc- Increase
Dec- Decrease
Ch- Chain
Sc- Single Crochet
St(s)- Stitch(es)
Sl st- Slip Stitch
FO- Fasten Off
BLO- Back Loop Only
HDC- Half Double Crochet
***The entire pattern is worked in HDC stitches.***
Crochet Toilet Paper Cover:
MR hdc 8 (8)
Inc hdc x 8 (16)
1 hdc, 1 inc x 8 (24)
2 hdc, 1 inc x 8 (32)
3 hdc, 1 inc x 8 (40)
4 hdc, 1 inc x 8 (48)
5 hdc, 1 inc x 8 (56)
6 hdc, 1 inc x 8 (64)
* Please Note*
This pattern was designed using a double roll size of toilet paper. For smaller or bigger rolls, your pattern may be a little bit different. Basically, keep increasing your magic ring until the circle fits to the edges of the toilet paper roll when placed on top of the roll.
Then, proceed to Round 9 below:
9. BLO hdc around (64)
10- 16. Hdc around (64)
You can make this section as long or as short as you need for your toilet paper roll. Once your rows reach the bottom of the toilet paper roll, you can fasten off and weave in the ends.
Finishing Up:
Place the toilet paper cover over the toilet roll. Measure a length of twine that is long enough to wrap around the toilet roll twice (or more if you want longer tails).
Cut as many strands as you want to create a thick, farmhouse style bow. I cut three separate strands.
Now, using all strands at the same time, wrap around the toilet paper cover and tie into a bow. It takes some fiddling to get the bow exactly how you want it.
When you are happy with the bow and placement, you can secure the bow to the toilet paper cover by placing a dab of fabric glue on the knot of the bow and gluing it in place.
And that’s it!
I hope you’ve enjoyed today’s free crochet pattern for a toilet paper cover! The possibilities are endless for colors and designs to match any style and any bathroom. Have you made one of these for your bathroom? Share below!
And stay cozy,
This post was for a free crochet toilet paper cover pattern.
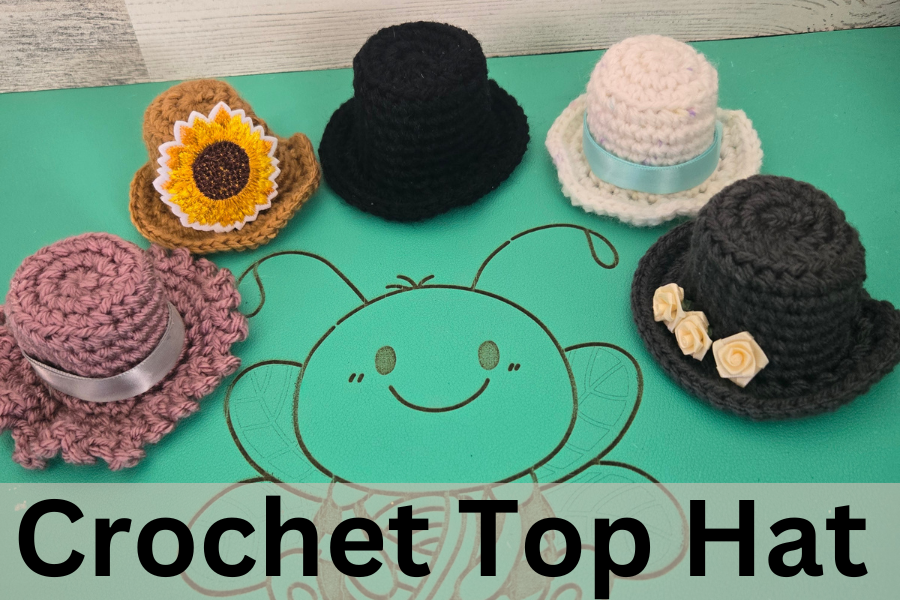
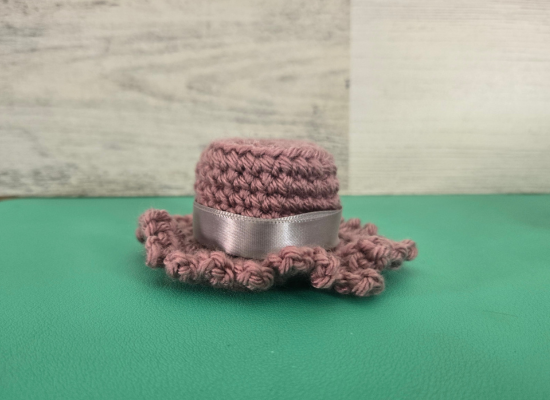
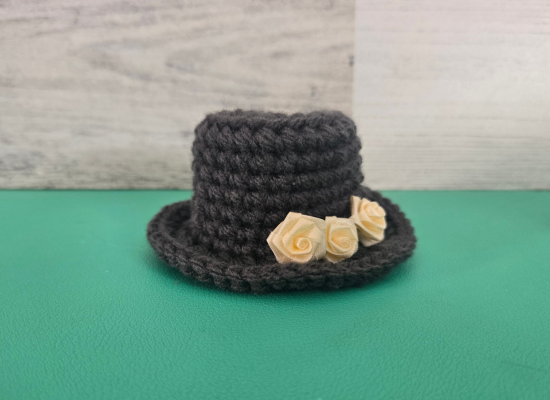
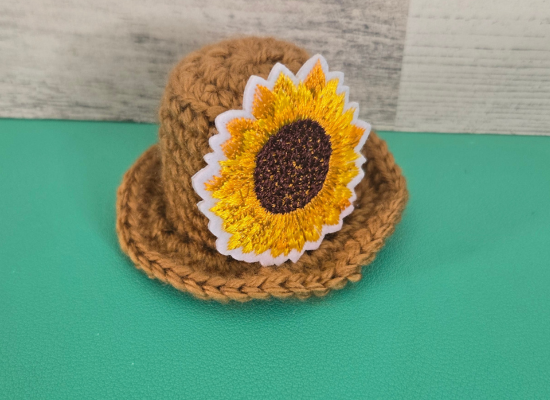
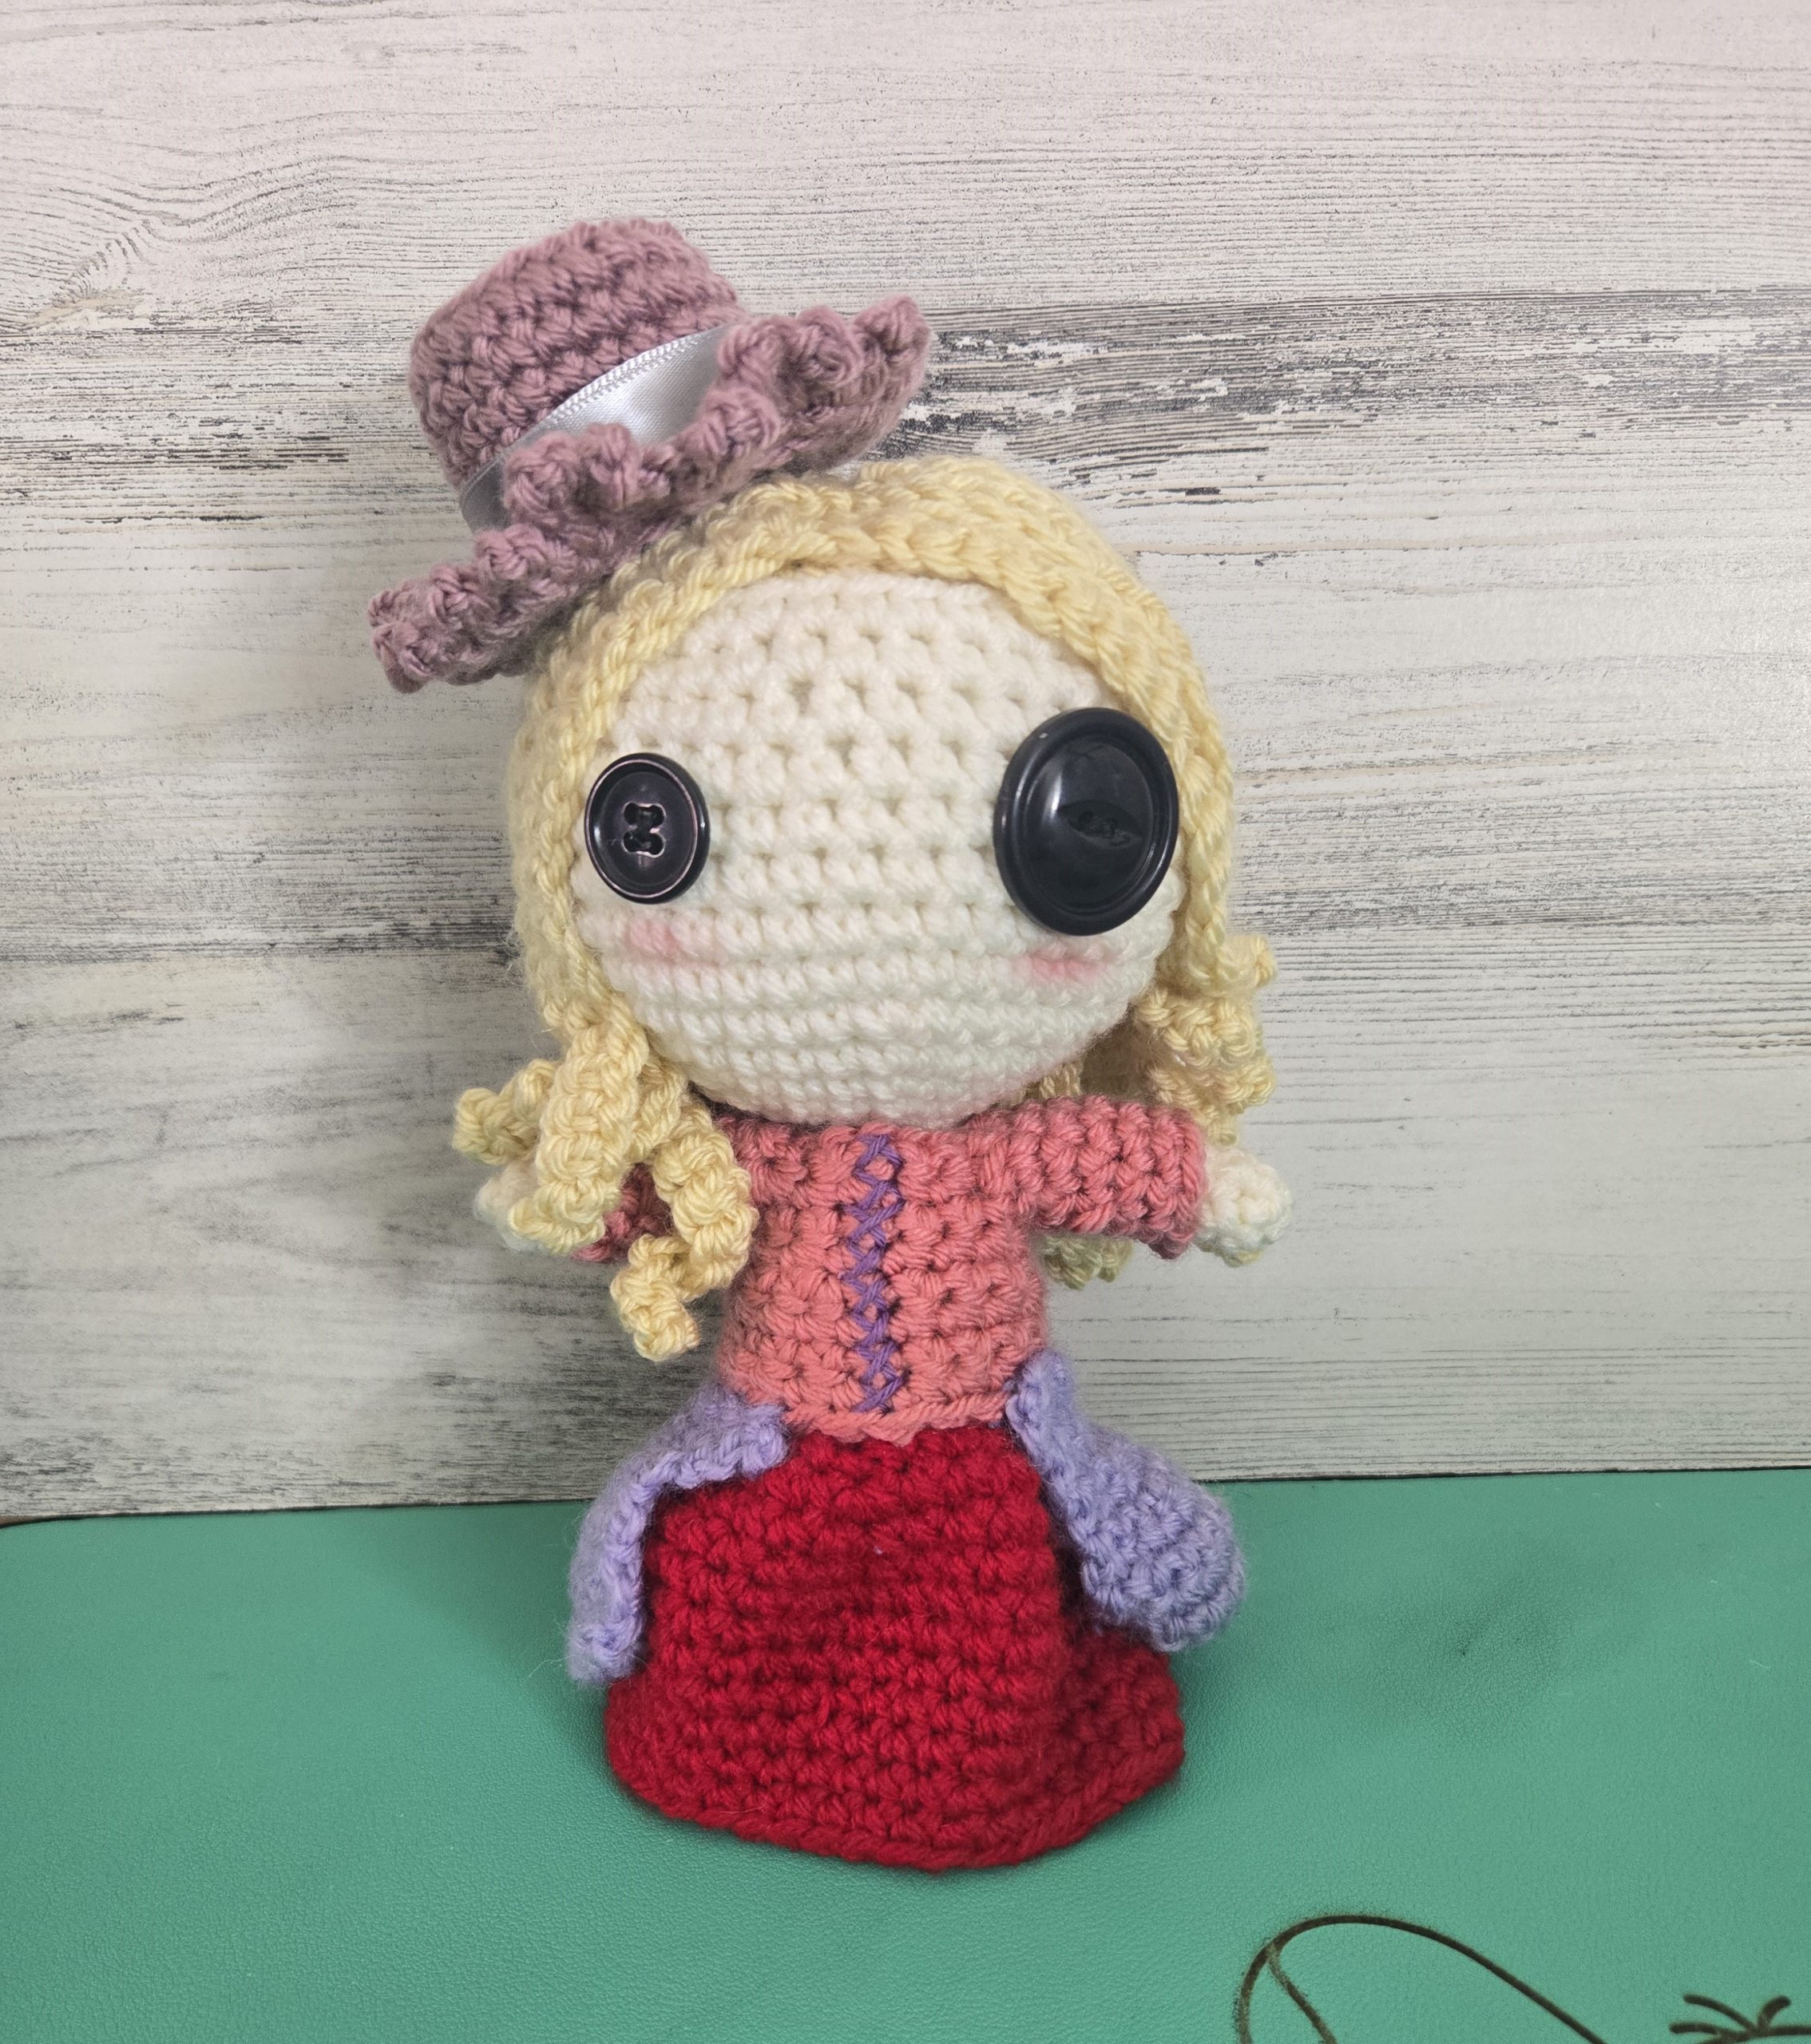
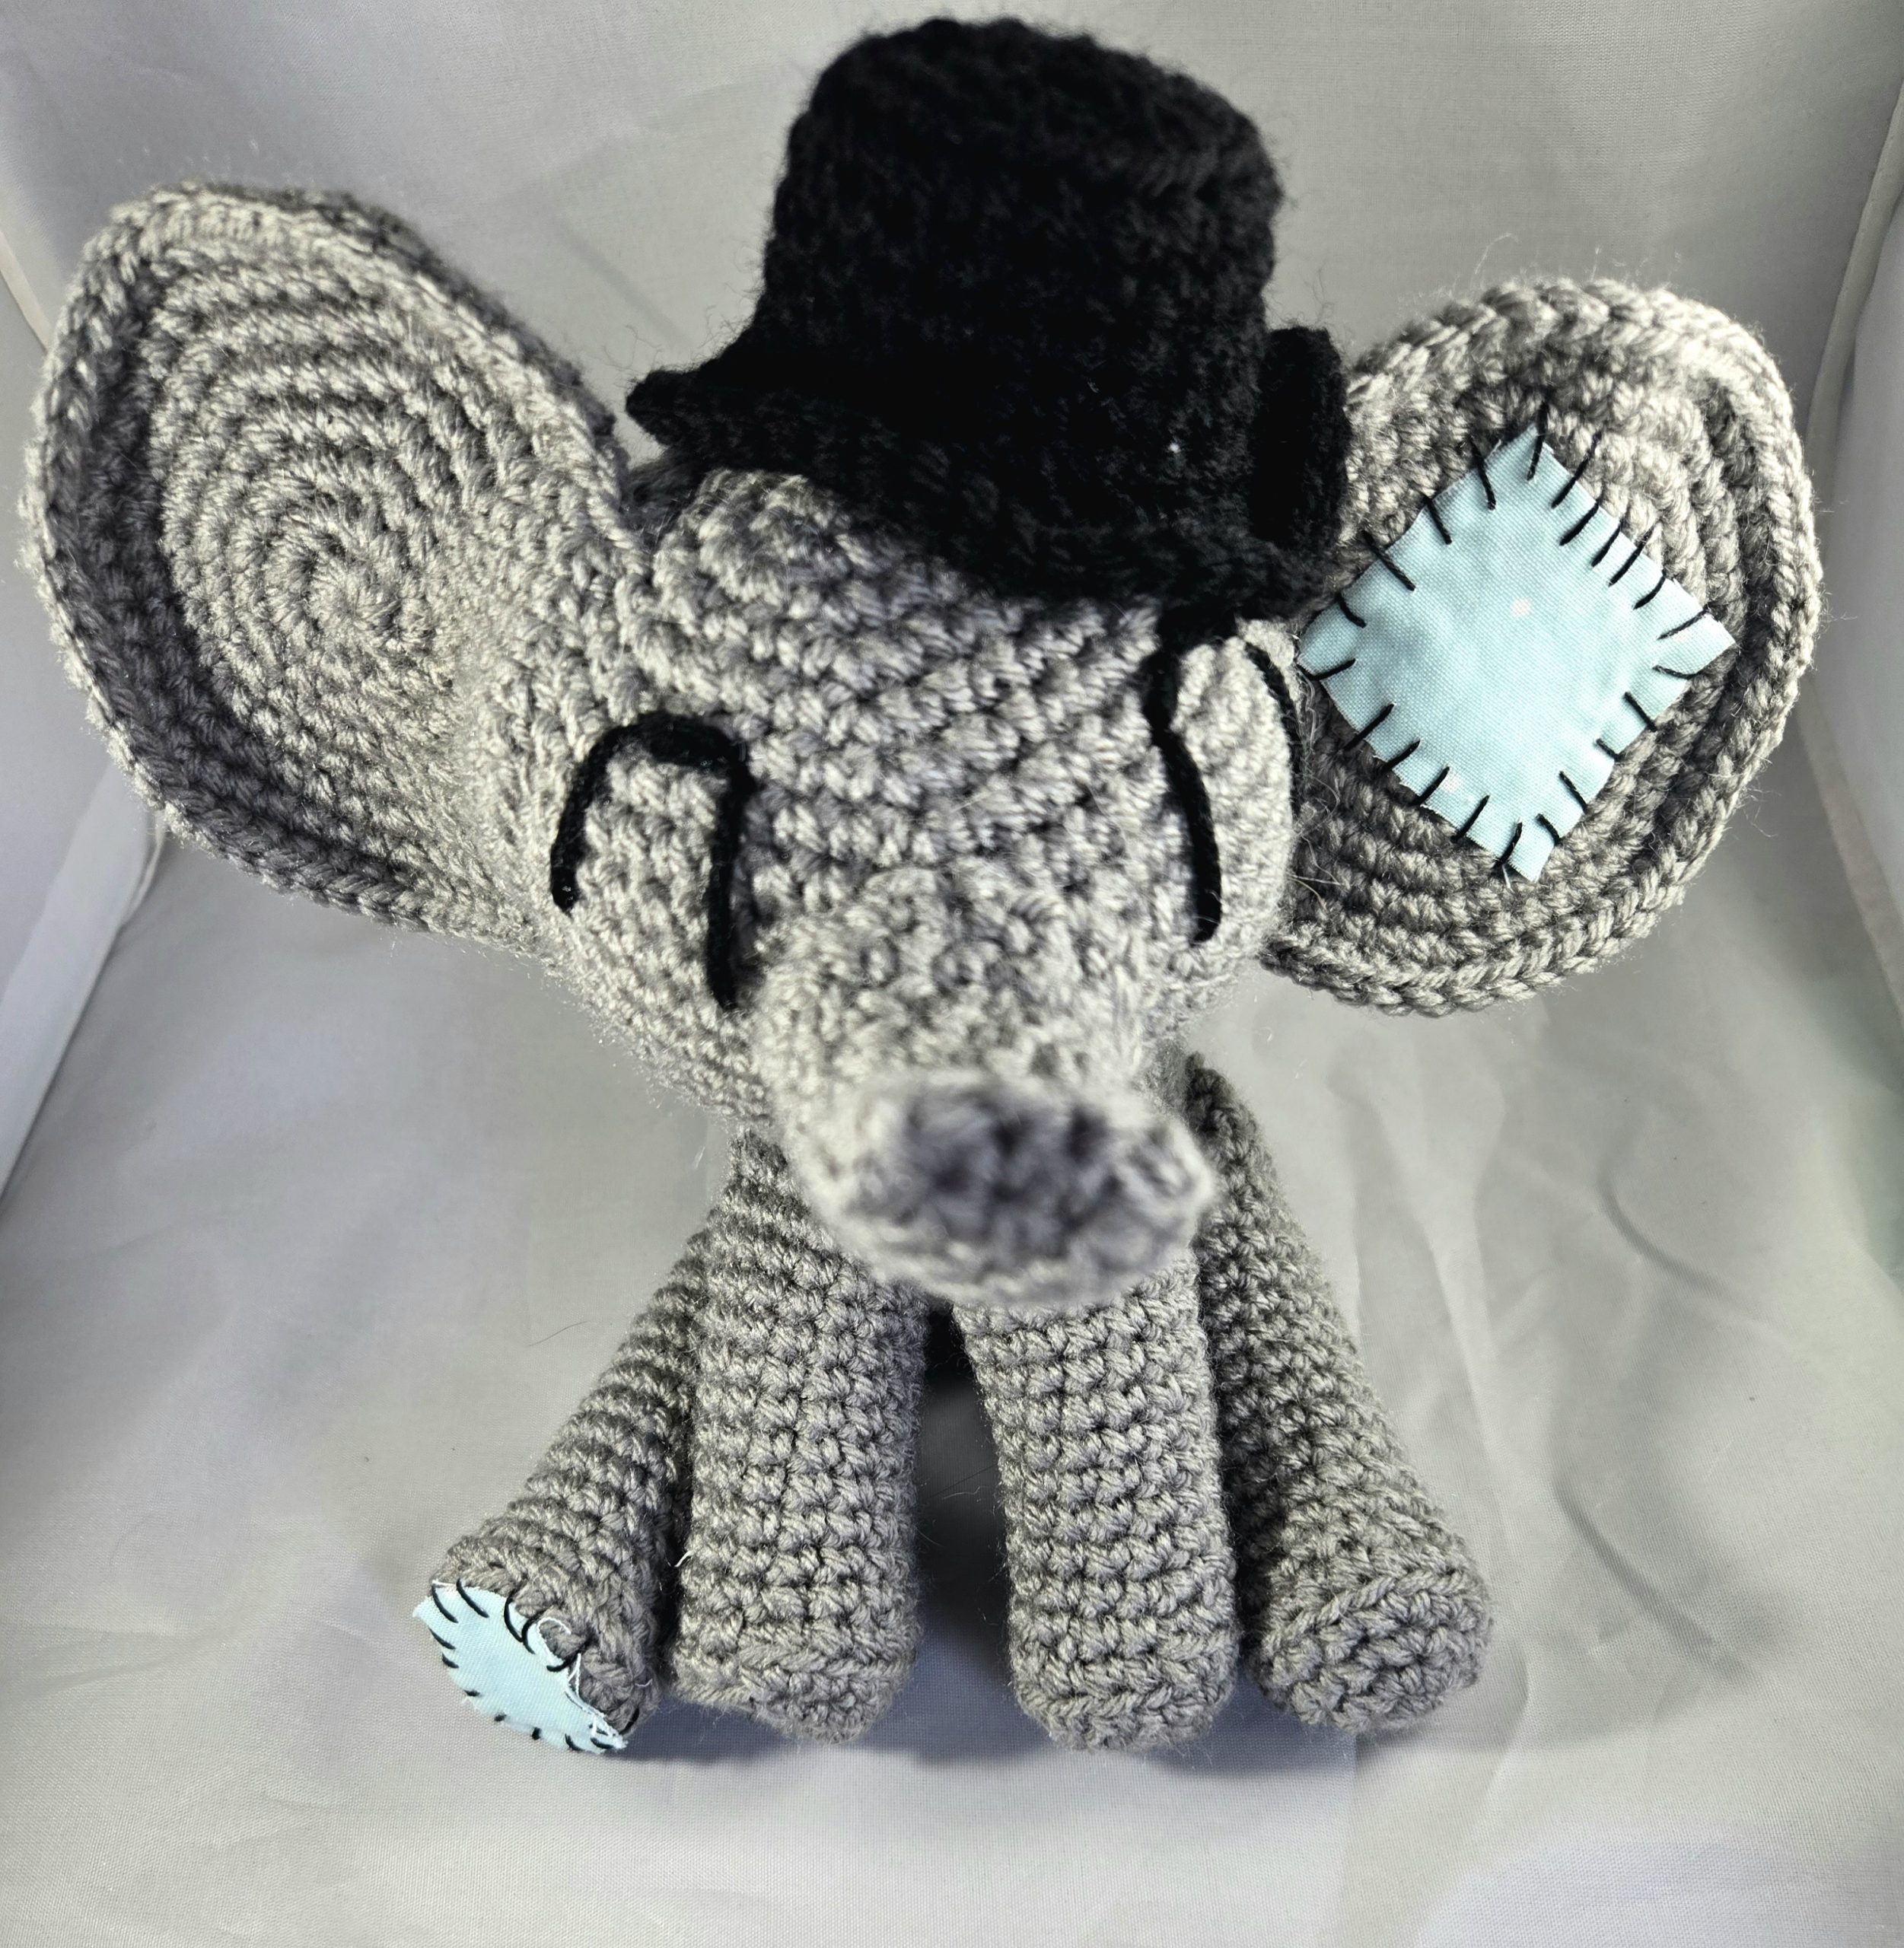
Looking for a free crochet top hat pattern for your amigurumi? This free pattern makes it easy to create these charming miniature hats!
Add a touch of dashing whimsy to your amigurumi projects with this adorable and easy design. They work up quickly, and there are so many variations to create a style for any character. Keep reading to learn the pattern!
My free patterns and pictures are for PERSONAL USE only. Please do not share, distribute, reproduce, publish, translate, alter, or resell this pattern in any way. Feel free to share or sell the finished product as long as you credit my design. Please share photos of your design with me by tagging me here on Instagram if you’d like; I love to see them!
Now, let’s get started. Happy wishes and cozy stitches!
This post is for a free crochet top hat pattern.
Tiny Top Hat Fun: Amigurumi Crochet Top Hat Pattern!
Supplies You Will Need:
Crochet hook: 3.5 mm (or whichever size you like best. Keep in mind the size of the finished project will be smaller or bigger depending on the hook you choose)
Worsted weight yarn in any color(s) you choose
Fabric glue (optional)
Yarn needle
Stitch marker
Scissors
Ribbon (optional)
Patches (optional)
Fabric swatches to make patches (optional)
Crochet Abbreviations:
MR- Magic Ring
Inc- Increase
Dec- Decrease
Ch- Chain
Sc- Single Crochet
St(s)- Stitch(es)
Sl st- Slip Stitch
FO- Fasten Off
BLO- Back Loop Only
FLO- Front Loop Only
P- Picot Stitch
Special Stitch Instructions:
Picot Stitch- ch 3, skip first and second chain on hook and sl st in first ch st made. Sl st into next two available stitches. One picot stitch made.
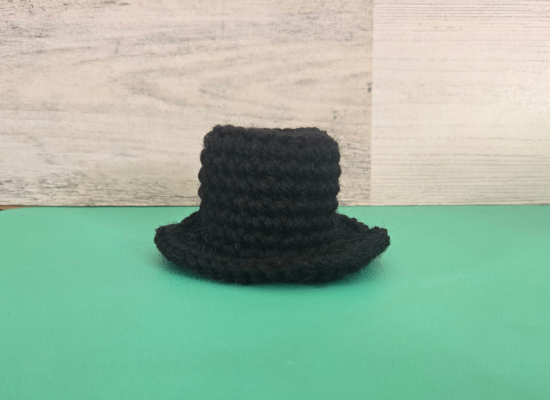
Crochet Top Hat Instructions:
1. MR 8
(8)
2. Inc x 8
(16)
3. 1 sc, inc x 8
(24)
4. BLO: sc around
(24)
5-10. Sc around
(24)
11. FLO: inc in each stitch around
(48)
12. Sc around
(48)
FO. Weave in ends.
That’s all there is to it!
Variations:
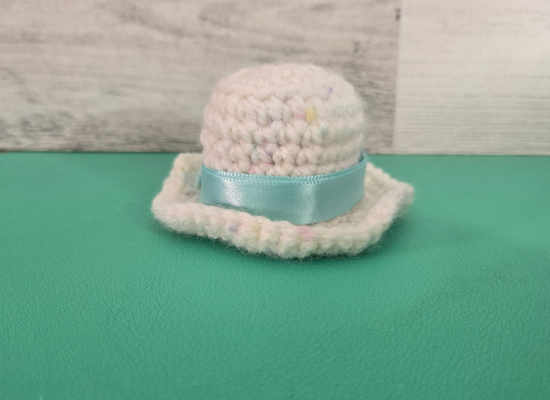
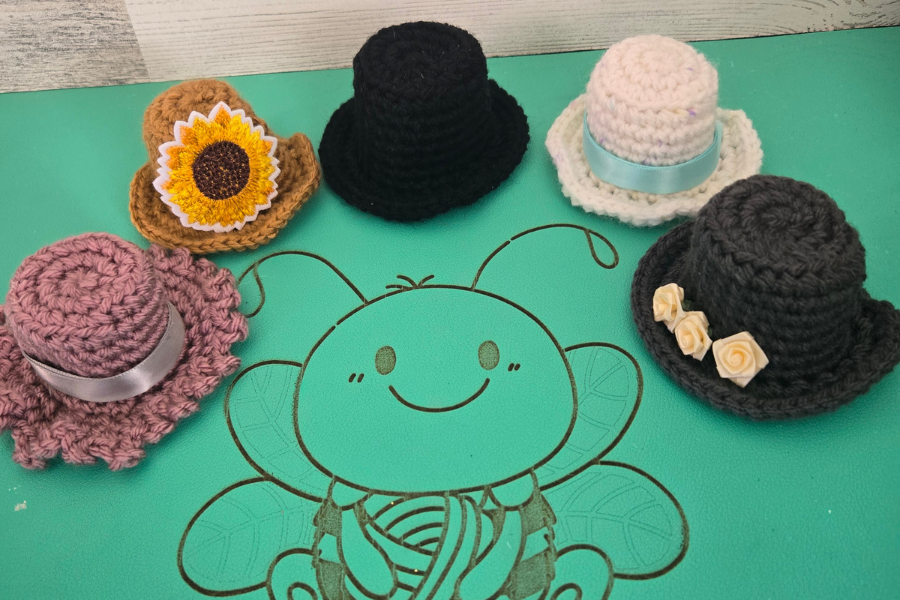
Add a ribbon! Glue a piece of ribbon around the base of the top hat for an instant vintage and formal look.
For an elegant, feminine touch, why not add a ruffled edge by creating a picot stitch on the last round instead of single crochet stitches? To create the picot stitch, follow the Special Stitch Instructions above for the last round!
For an extra dash of whimsy, glue some small flowers or patches to the top hat!
And voila! Your crochet top hat is ready to grace the head of any of your projects.
And that’s it! I hope you enjoyed today’s free pattern for a crochet top hat for amigurumi. Have you made any of these styles or created your own? Share below!
And stay cozy,
This post was about a free crochet top hat pattern.
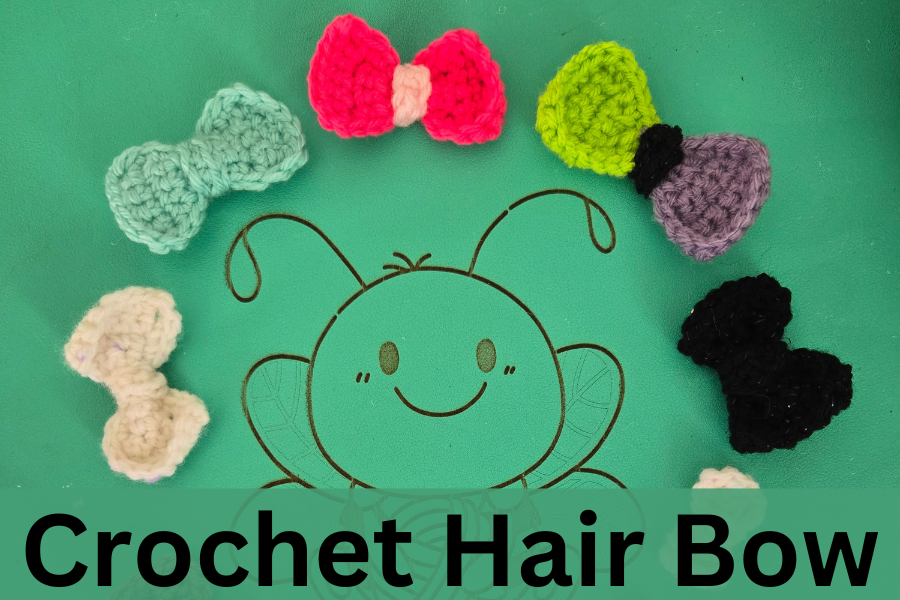
Hair bows are some of the cutest accessories, and a crochet hair bow is a fun and easy project that works up quickly. You can make a lot of them in a short amount of time, and they are so customizable. Perfect for any style!
Whether you crochet them for yourself or for gifts, this cute crochet hair bow will be the perfect stash-busting project! I’ve even included a smaller version of the pattern so you can create a hair bow for your amigurumi projects as well. Read on for the free pattern! Happy wishes and cozy stitches.
These patterns and pictures are for PERSONAL USE only. Please do not share, distribute, reproduce, publish, translate, alter, or resell this pattern in any way. Feel free to share or sell the finished product as long as you credit my design. Please share photos of your design with me by tagging me here on Instagram if you’d like. I love to see them!
Now, let’s get started!
This post is for a free crochet hair bow pattern.
Crochet Hair Bow Pattern
Supplies You Will Need:
Crochet hook: 4.00 mm (or whichever size you like best. Keep in mind the size of the finished project will be smaller or bigger depending on the hook you choose)
Worsted weight yarn in any color(s) you choose
Fabric glue
Duck bill hair clips
Yarn needle
Stitch marker
Scissors
Buttons (optional)
Crochet Abbreviations:
Inc- Increase
Dec- Decrease
Ch- Chain
Sc- Single Crochet
St(s)- Stitch(es)
Sl st- Slip Stitch
FO- Fasten Off
Sc3tog- Single Crochet 3 Together (decreasing three stitches into one)
3 sc inc- 3 Single Crochet Increase (create 3 sc in a single stitch to increase)
Bow:
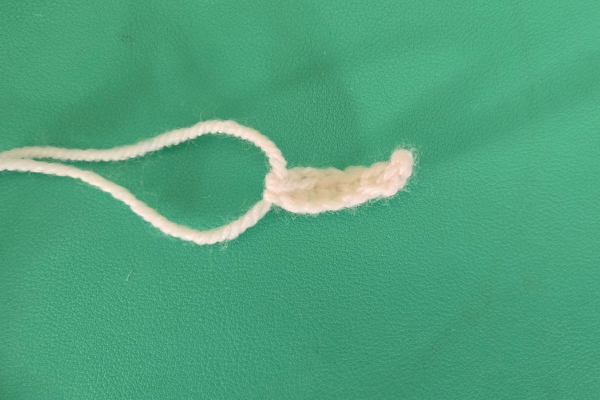
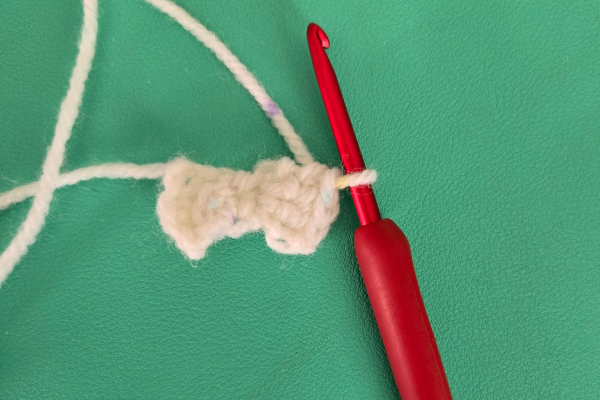
ch 7, turn (6)
Sc across, ch 1, turn (6)
Dec, sc 2, dec, ch 1, turn (4)
Sc across, ch 1, turn (4)
Dec x 2, ch 1, turn (2)
Sc across, ch 1, turn (2)
Inc x 2, ch 1, turn (4)
Sc across, ch 1, turn (4)
Inc, sc 2, inc, ch 1, turn (6)
Sc across (6)
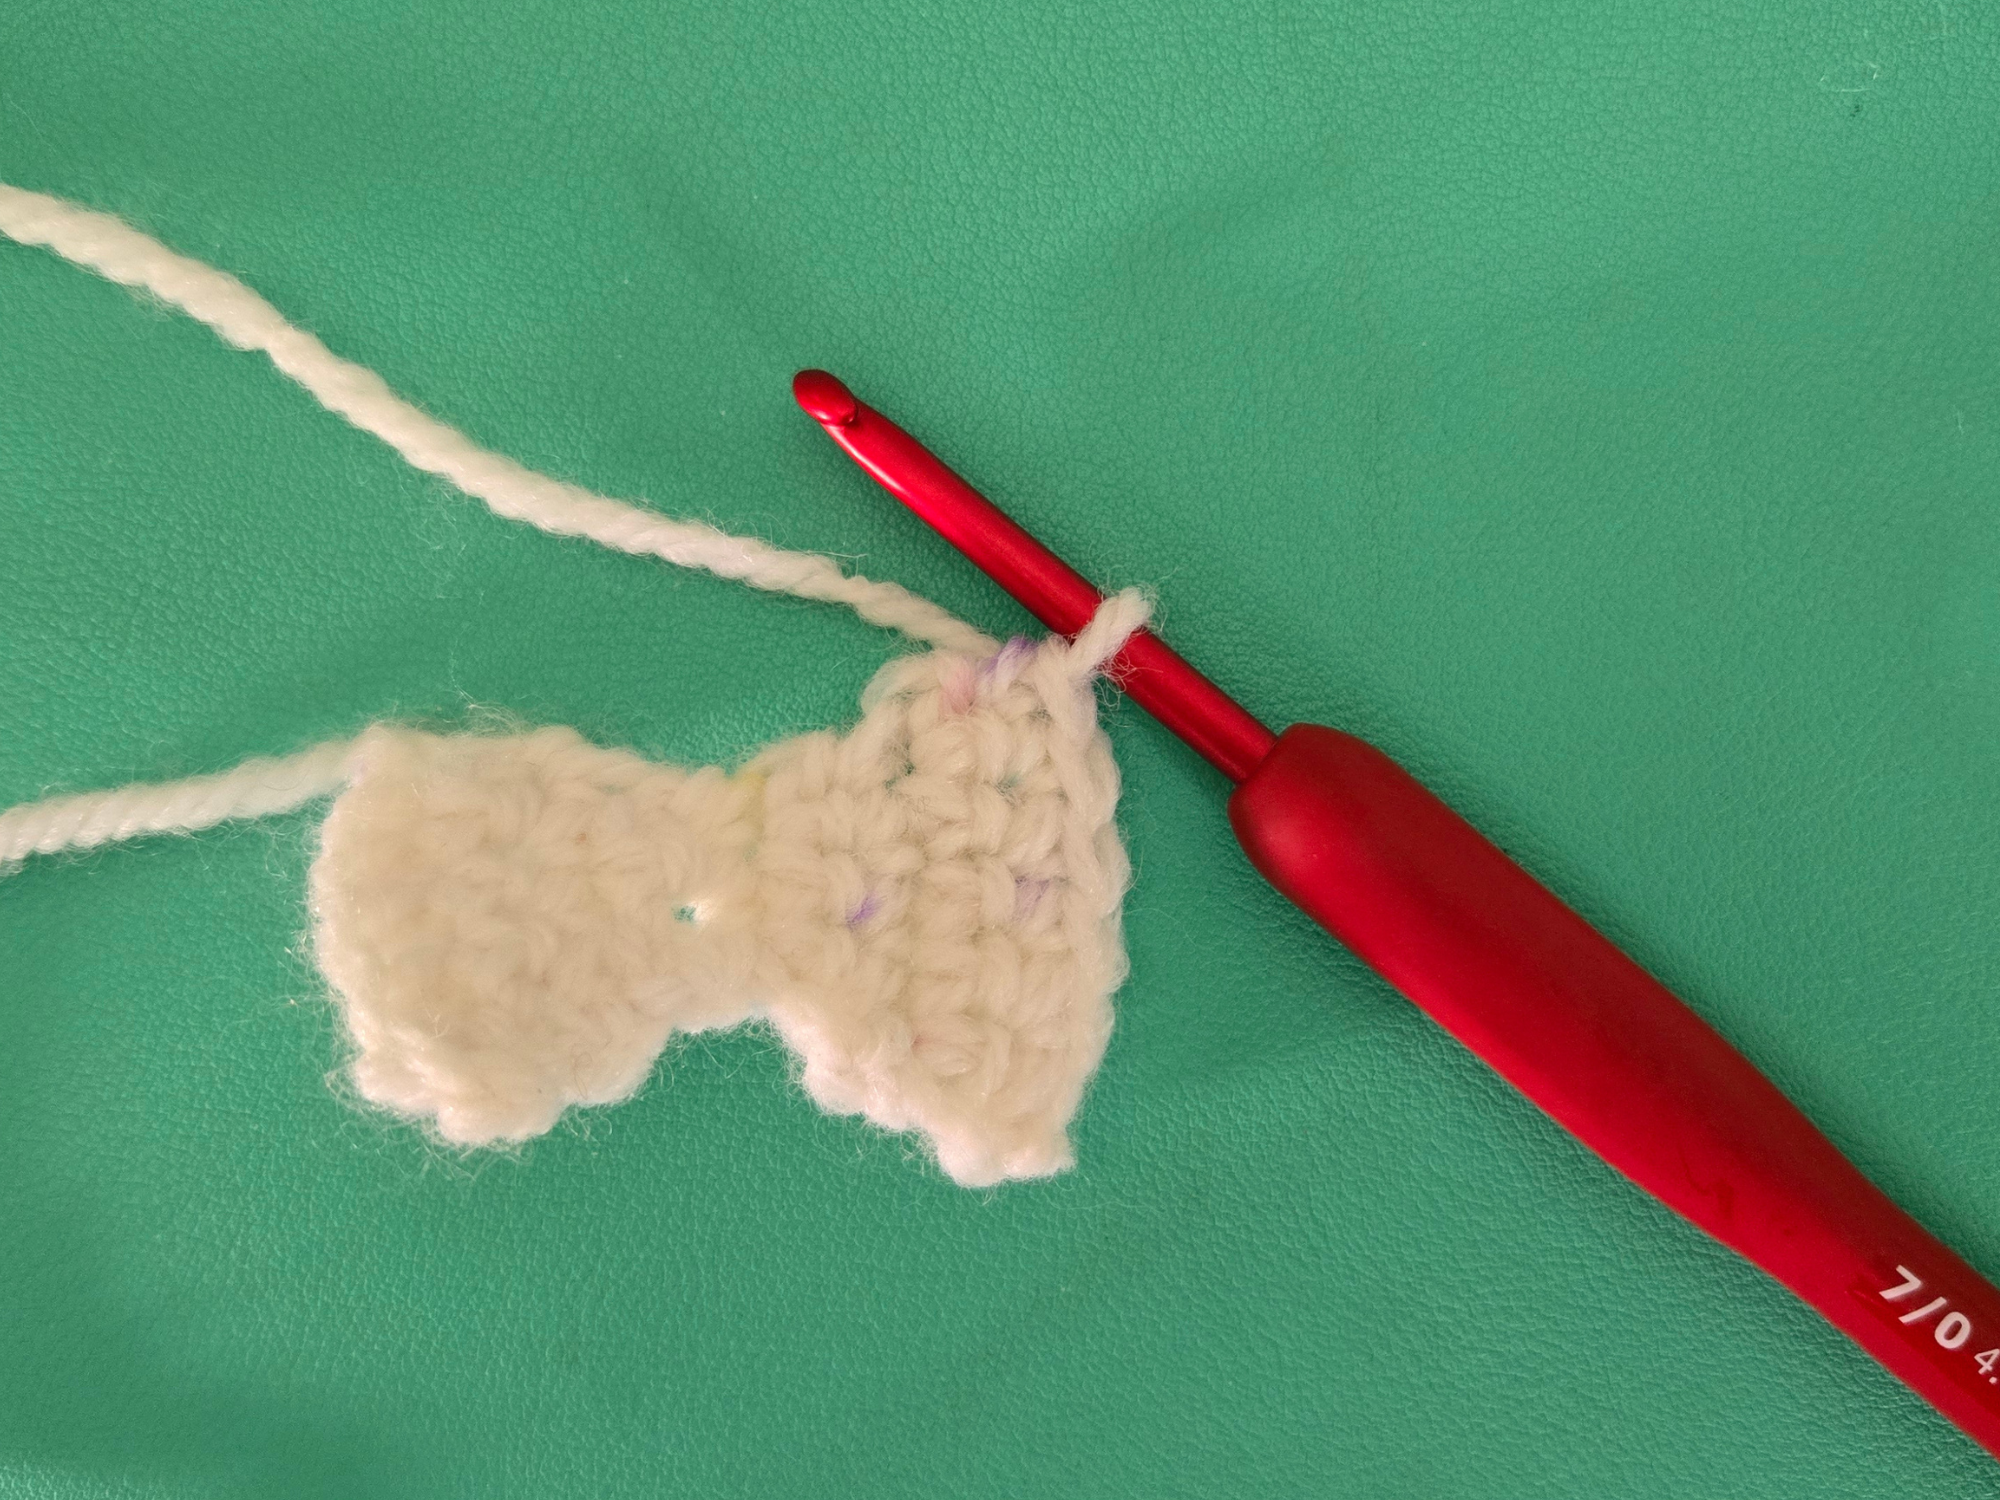
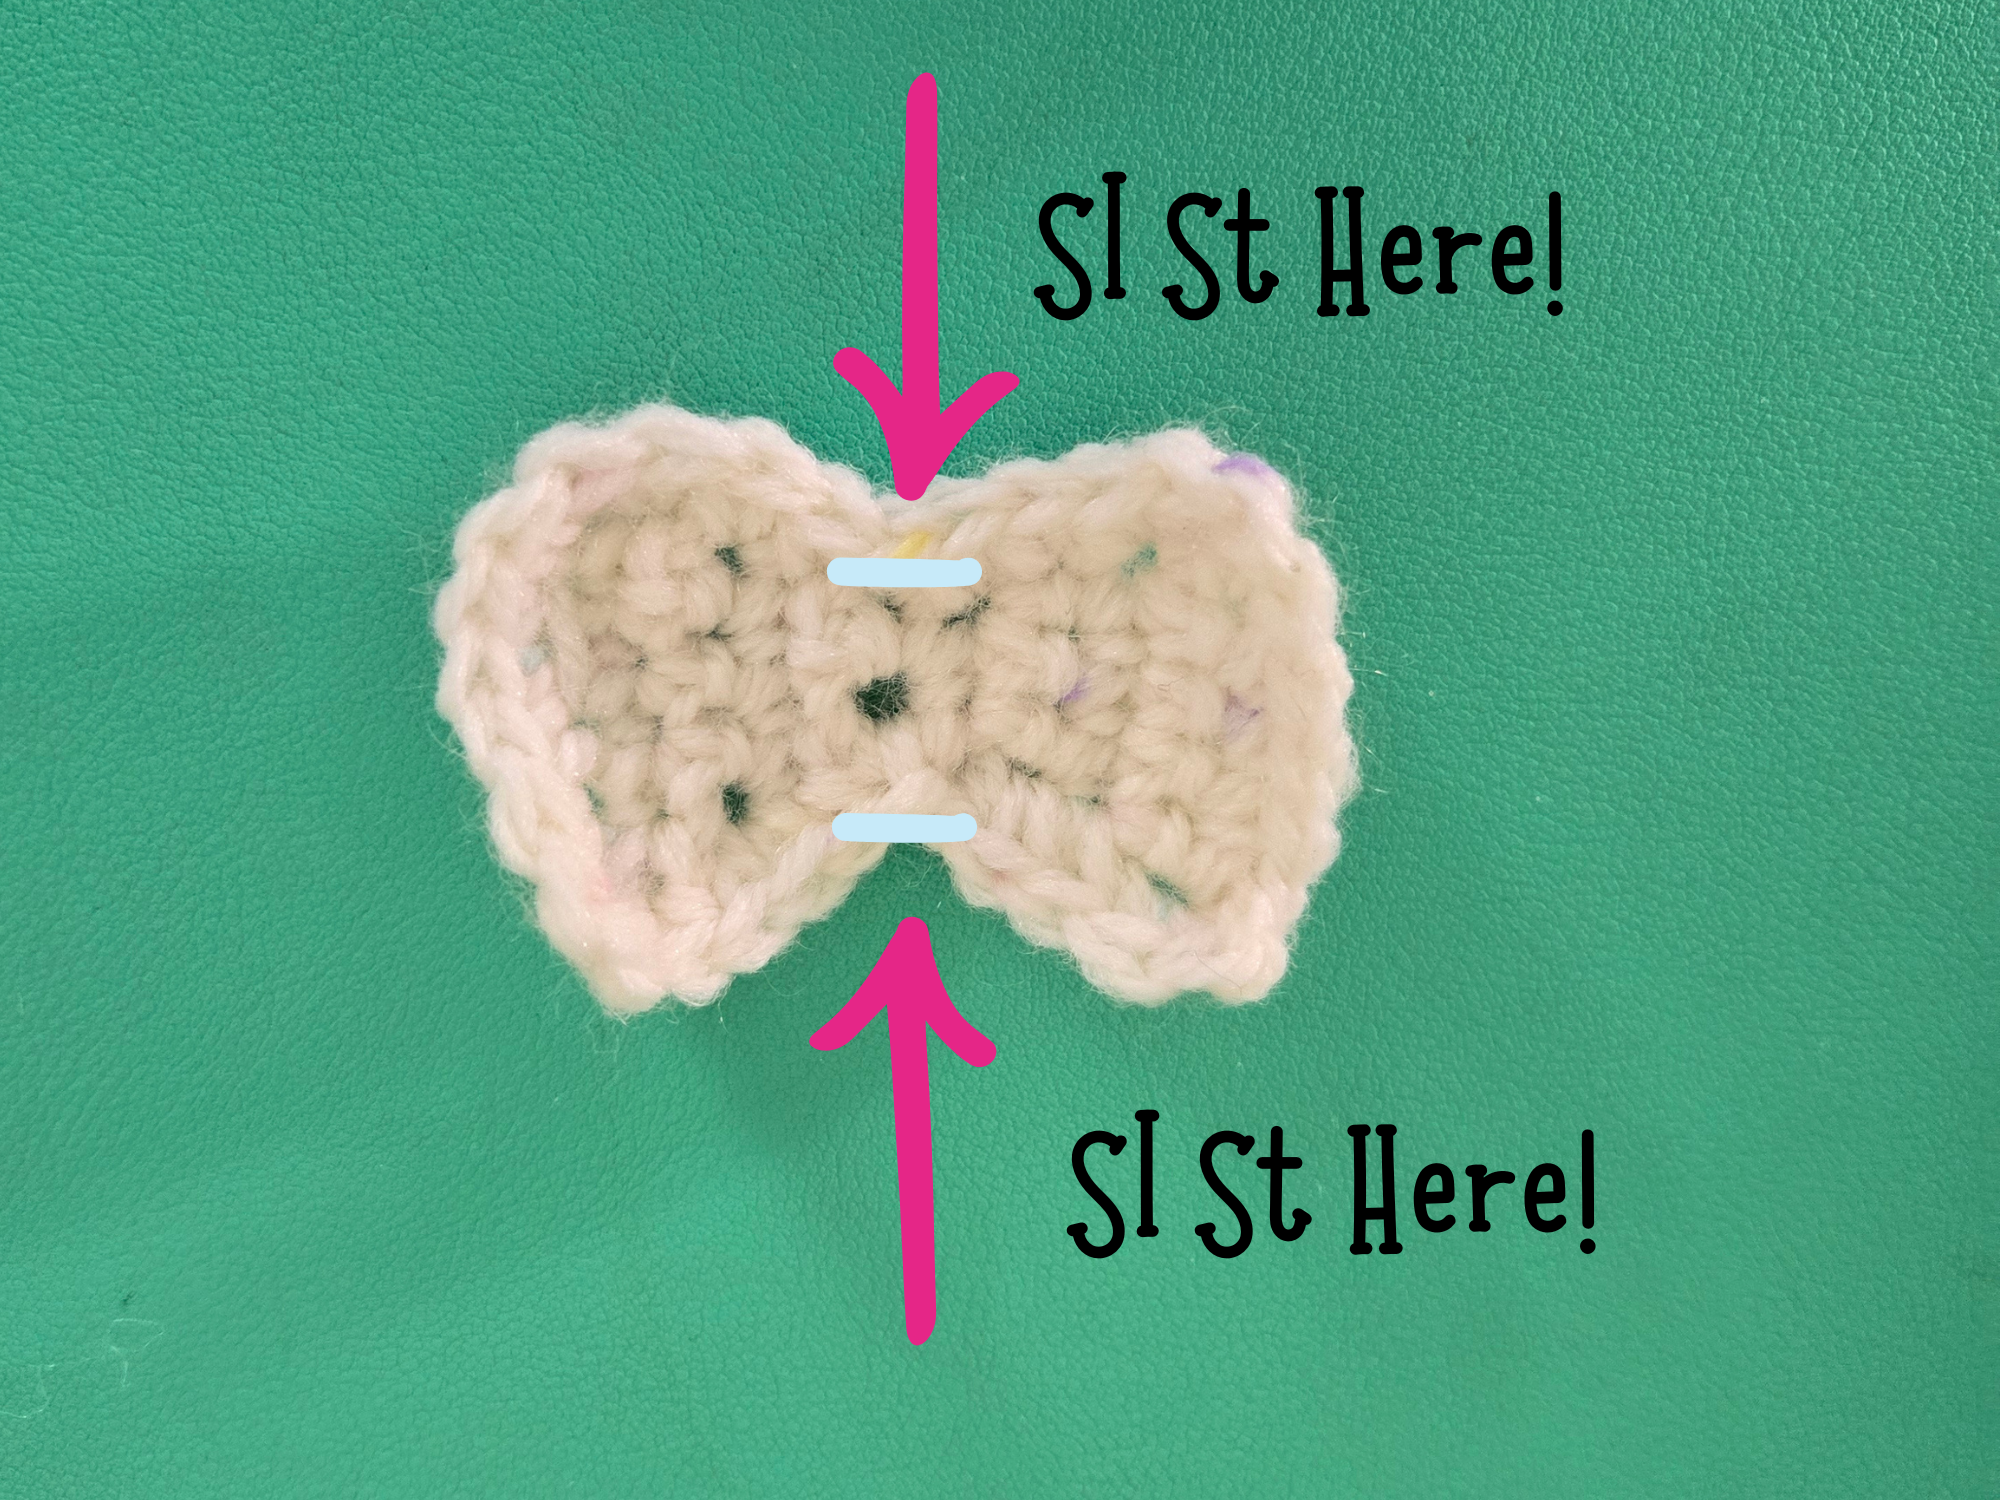
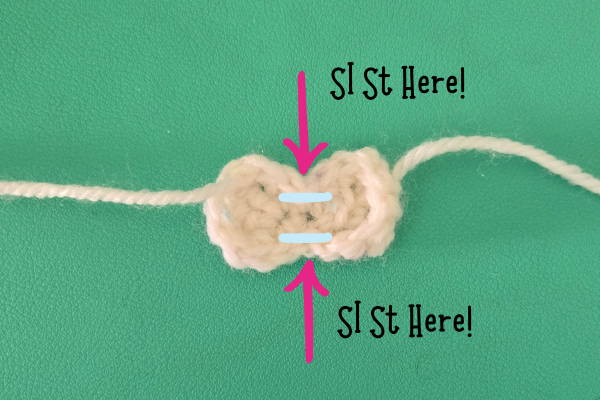
Starting in the top right corner,
sc around the edge of the entire bow to make
a neat edge all the way around. To keep more of
a bow shape, crochet a sl st in the middle stitches
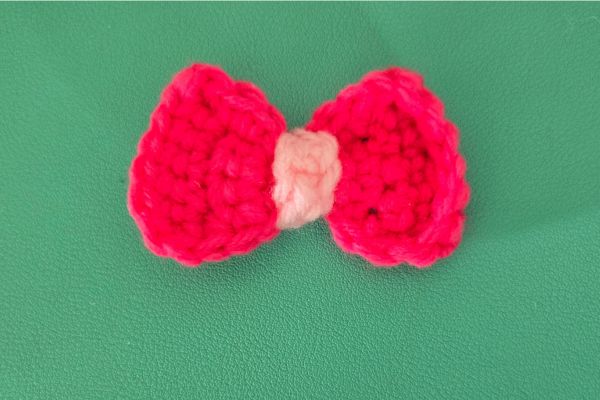
where the bow knot should be. See pics below for
reference!
FO. Weave in ends.
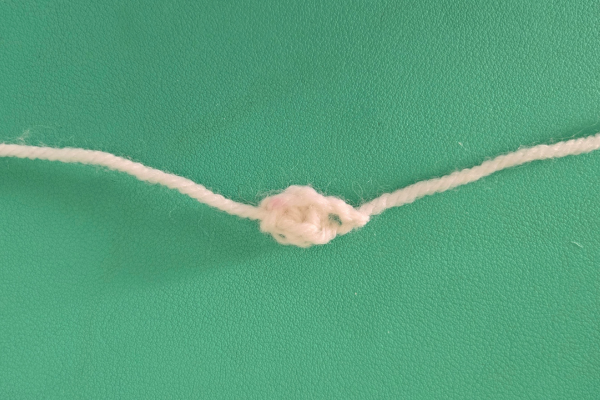
Middle Knot:
Ch 7, turn (6)
Sc across (6)
FO. Leave a long tail for sewing, or weave in ends
if you plan to use glue.
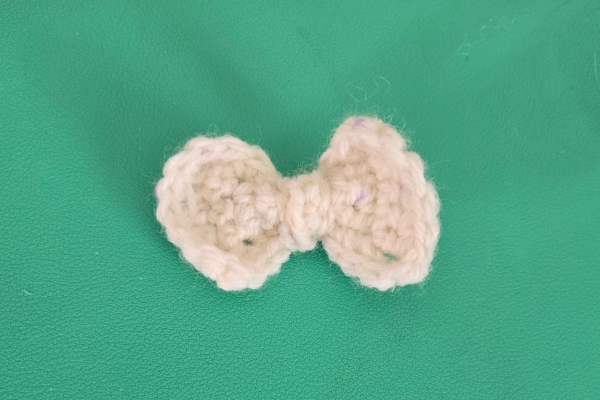
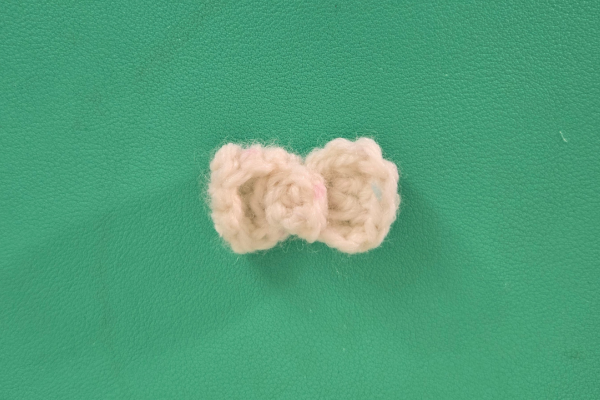
Wrap around the middle part of the bow piece. Sew
or glue in place.
Variations:
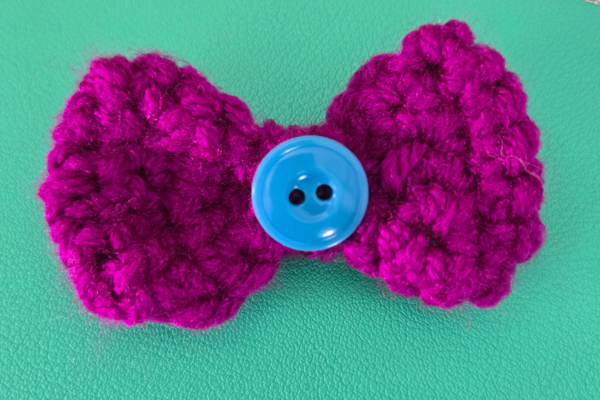
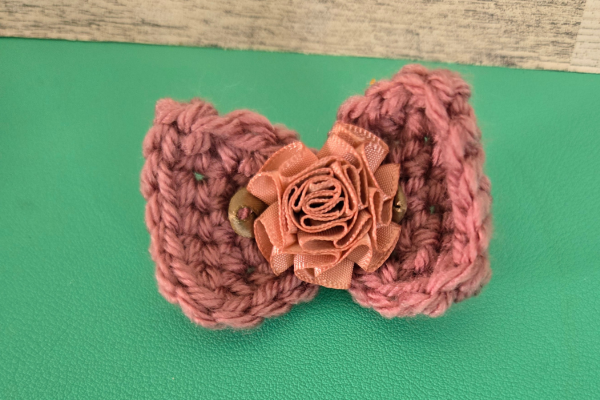
Instead of making the middle knot piece, try gluing or sewing a button instead!
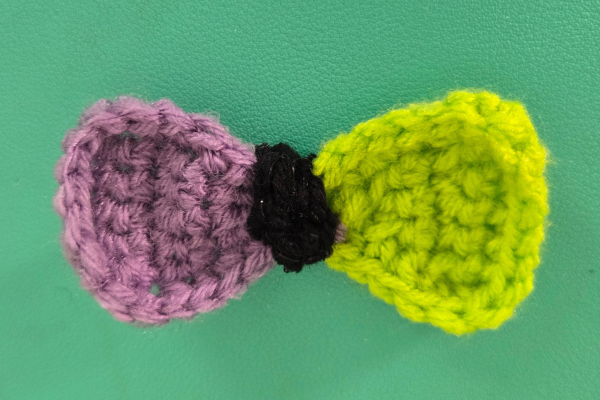
Try mixing up the colors by crocheting the middle knot a different color.
Maybe switch it up with a color change half way through the bow, and have two different colored sides! Plus a different colored middle knot piece as well to give it even more of a multicolored look.
Finishing Up:
To finish your crochet hair bow, add a small dollop of fabric glue to the back of the hair bow piece. Pinch the clip to open, and press the bow to the duck bill clip. Hold for approximately 30 seconds to set the glue.
Leave to dry for 24 to 48 hours before your first use.
Alternatively, you can slip the top of the clip through one of the stitches on the back of the bow and slide the bow onto the clip as far as you can. No sewing or gluing required!
And you’re all set!
Mini Crochet Hair Bow for Dolls and Amigurumi
To create a bow small enough for our dolls and amigurumi projects, we are basically going to repeat the above steps, but on a mini scale!
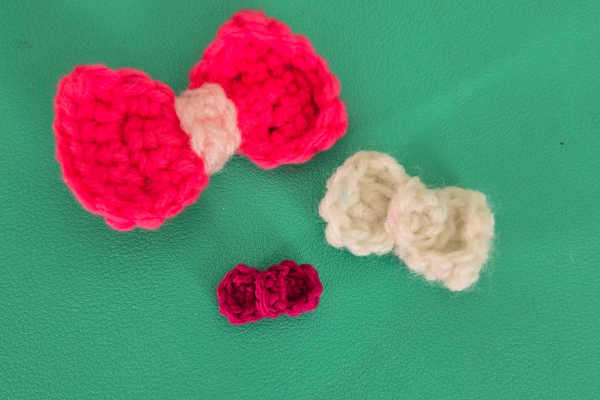
I’ve crocheted mine in worsted weight yarn, and it is about 1.5 inches wide. For an even smaller bow, try crocheting it with a smaller crochet hook and a thinner yarn!
Mini Hair Bow:
Ch 4, turn (3)
Sc across, ch 1, turn (3)
Sc3tog, ch 1, turn (1)
Sc across, ch 1, turn (1)
3 sc inc, ch 1, turn (3)
Sc across (3)
Starting in top right corner of bow, sc around
entire bow to make a neater edge. Sl st in the
middle stitches to keep the bow shape. See
pics below for reference.
FO. Weave in ends.
Mini Bow Knot:
Ch 4, turn (3)
Sc across (3)
FO. Leave a long tail for sewing, or weave in ends
if you plan to use glue.
Wrap around the middle part of the bow piece. Sew
or glue in place.
The maroon bow in the picture below was crocheted with a 2 mm hook and Hobbii Rainbow 8/4 (Size 1) yarn.
And there we have it! A super simple crochet hair bow pattern easy enough for beginners! With so many colors and styles of yarn to choose from, there are so many possibilities when it comes to creating this adorable accessory.
Have you created one of these crochet hair bows? Share below!
And stay cozy,
This post was all about a crochet hair bow pattern.
Looking for fun crochet patterns for boys? Whether you’re making a handmade birthday gift, a Christmas present, something for a baby shower, or just a fun project for a little guy who loves dinosaurs, trucks, animals and more, this collection has plenty of ideas to choose from.
I’ve rounded up crochet patterns for boys of different ages and interests, including amigurumi toys, hats, blankets, clothing, dinosaurs, vehicles and creative handmade gifts. You’ll find both free crochet patterns and paid PDF patterns, so there’s something here for every crocheter and every project list.
Happy wishes and cozy stitches.
25+ Best Crochet Patterns for Boys: Toys, Hats, & More!
Best Crochet Toys for Boys
1. Toy Car Amigurumi Pattern
Image courtesy of Julienne at Nephithyrion
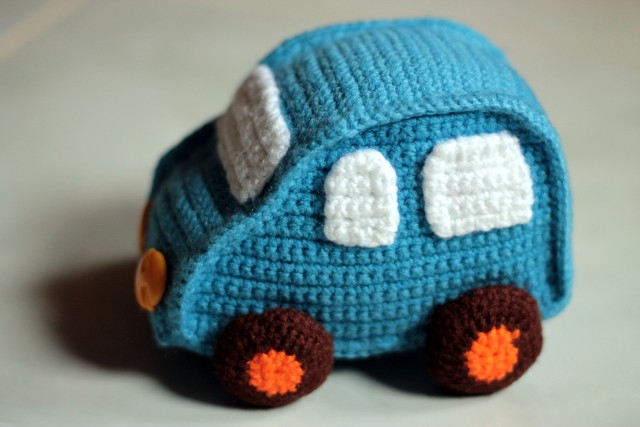
Pattern Name: Crochet Toy Car Designer: Julienne at Nephithyrion Free/Paid: Free pattern Skill Level: Advanced beginner/Intermediate Best for: Infants and toddlers who would benefit from having soft, safe, plushy toys.
When I saw this Amigurumi Toy Car by Julienne at Nephithyrion, it was just too cute to not include it! I love the blocky, cartoon-like style that just makes this pattern so adorable. With a variety of colors, the little one in your life could have a whole garage full to play with!
Pattern Name: Gecko Frecko Designer: Raphaela Blumenbunt Free/Paid: Free PDF download available Skill Level: Intermediate Best for: Gifts for toddlers, young children, and teens!
Next on the list, we have Gecko Frecko by Raphaela Blumenbunt! I love to crochet amigurumi, and the bigger projects like this one are always so much fun when they are finally done! I love the color scheme she chose to make this gecko so colorful, and I’m sure this would bring a smile to the lucky little boy you make this for!
Pattern Name: Crochet Rainbow Snake Designer: Golden Lucy Crafts Free/Paid: Free pattern with the option to purchase a PDF download Skill Level: Easy, beginner-friendly Best for: Intended to be crocheted in similar fashion to a temperature blanket, this snake is meant to be crocheted with a different colored round of stitches each day to indicate the temperature of that day. That makes it a perfect gift option! Maybe you could give a child a birthday gift with a snake that changed colors based on the temperature every day that year.
Another fun one to add to the list is this Rainbow Snake by Golden Lucy Crafts! This pattern is so cute, and I love the bright colors! I think you’d have one happy little dude if this was gifted to him!
Pattern Name: Racetrack Rug Pattern Designer: Cynthia Rae Free/Paid: Free Skill Level: Easy Best for: Toddlers/young children
This Racetrack Rug crochet pattern by Cynthia Rae is incredible! The embroidery in the road and the grassy details really bring this racetrack to life. Pair this with some amigurumi cars, and the kids will be racing for hours! What a fun gift idea.
Pattern Name: Crochet Digger Loader Designer: Dedri Uys over at LookWhatIMade.net Free/Paid: Free Skill Level: Intermediate Best For: Toddlers/ young children
I remember the days when my cousins were always playing with their Tonka trucks, so crocheting a digger loader toy is such a fun and unique idea! I love all the little details that add so much character to this design.
Dedri, the pattern designer over at Look At What I Made, designed the toy using the linen stitch, but the scoops and buckets on the digger are crocheted by working over the top of slip stitches to create a sturdy piece that holds its shape.
Pattern Name: Baby Dino Amigurumi Designer: Studio Elegant Designs Free/Paid: Paid PDF pattern download Skill Level: Intermediate Best for: Halloween crochet, dinosaur plushy collectors, spooky cute nursery decor, unique gifts for dino fans
It wouldn’t be this blog without featuring at least one spooky-cute crochet pattern! For Halloween fans or just a unique take on a classic dino design, this pattern is sure to be a hit for dinosaur lovers!
Pattern Name: Troy the T-Rex Designer: Holly at Storyland Amis Free/Paid: Free and paid PDF versions available Skill Level: Easy Best For: Babies, toddlers, children, teens, and anyone who loves a cute and squishy dinosaur plushy!
This T-rex crochet pattern is to die for! It’s one of the most adorable patterns I’ve ever seen, and it’s a must-make for the dinosaur lover in your life!
Pattern Name: Tanner the Triceratops Designer: Nicole over at The Nicole Chase Free/Paid: Free Skill Level: Advanced Beginner Best For: Babies, toddlers, children, teens, and anyone who loves a cute and squishy dinosaur plushy!
Pattern Name: Large Dinosaur Crochet Pattern Designer: Crochet Kingdom Free/Paid: Free Skill Level: Easy Best For: The large plushiness of this dinosaur pattern makes a perfect gift for babies and toddlers to snuggle!
I absolutely adore the extra big chunkiness of this dinosaur crochet pattern! It’s extra big, extra stuffed, and extra perfect for littles who want to hug a dinosaur!
Pattern Name: Mohawk Hat Designer: Ashlee Marie Free/Paid: Free Skill Level: Easy Best For: Babies, but the pattern is also written with instructions for children, teens, and adults!
This Crochet Mohawk Hat Pattern by Ashlee Marie is to die for! It brought a smile to my face as soon as I saw it, and I knew I had to include it in this roundup. How cute is this? I’m definitely going to be making one of these!
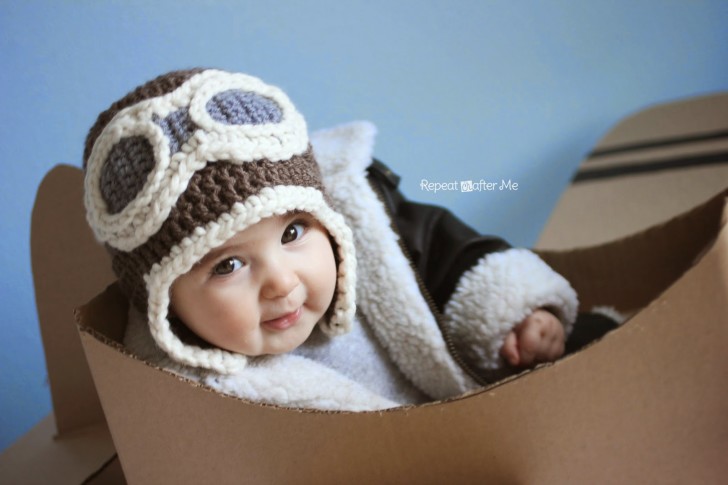
Pattern Name: Crochet Aviator Hat Designer: Repeat Crafter Me Free/Paid: Free Skill Level: Easy Best For: Babies, but this pattern includes instructions to make an Aviator Hat for all ages!
I am a big fan of Sarah at Repeat Crafter Me’s work. I constantly seem to be ending up on her pattern pages because of her adorable patterns, and this Crochet Aviator Hat is no exception! How darling is this? Both fun and functional, this one has definitely landed on my list of awaiting projects.
Pattern Name: Little Man Crochet Sun Hat Designer: Traverse Bay Free/Paid: Free Skill Level: Any skill level Best For: Newborn to child sizes
For another dashing wardrobe addition, why not crochet this Little Man Crochet Sun Hat by Traverse Bay for the little man in your life? This bucket hat is adorable and perfect for keeping the sun out of your little one’s eyes on sunny days! The pattern also comes in five different sizes, ranging from newborn to child, which makes it so much more versatile.
The pattern designer recommends making this one with a cotton yarn as it is much more breathable and better for those warm summer days!
Pattern Name: Crochet Dinosaur Hat Designer: Maria’s Blue Crayon Free/Paid: Free Skill Level: Advanced Beginner
This Crochet Dinosaur Hat is perfect for the winter months, and it’s sure to be a wardrobe favorite for the dinosaur-loving boys (or girls!) in your life.
This pattern is also created using a single crochet stitch in the back loops. So, while it looks like quite a complicated design, it is actually more beginner friendly than it seems, and I love that!
Pattern Name: Dino Spike Hat Designer: Loveable Loops Free/Paid: Free Skill Level: Beginner-friendly Best For: Toddler, child, and adult sizes!
For another version of a dinosaur hat, give this Crochet Dino Spike Hat by Lovable Loops a try! I love the genius of the simplicity of this design. Add some spikes in bright colors, and you’ve got yourself a Dino Hat! Absolutely adorable, and sure to be another favorite!
Pattern Name: Firefigher Helmet Designer: Micah York Free/Paid: Paid Skill Level: Easy Best For: This pattern is available in newborn, infant, toddler/child, and teen/adult sizes!
This Firefighter Helmet by Micah York is so adorable! Whether for Halloween or everyday play time, this hat is sure to be a hit. It looks as much fun to crochet it as it would be to wear it! Best of all, the pattern is available in sizes ranging from newborn to adult, so there’s an option for any of the firefighter helmet giftees in your life.
Pattern Name: Newborn Cowboy Hat and Boots Designer: Cro-Shayley Free/Paid: Free Skill Level: Advanced Beginner to Intermediate Best for: Newborns
This little Cowboy Hat and Boots by Cro-Shayley are some of the cutest things I have ever seen! Such a fun costume idea, or just fun to jam to country music with your little man dressed in his spurs and Stetson. Howdy, partner!
Pattern Name: Police Hat and Diaper Cover Designer: Jessica Gammon Free/Paid: Paid Skill Level: Easy
Best For: 0-3 months
I’m really leaning into the costume aspect of crochet clothing here, but I can’t resist with all of these cute ideas. This Police Hat and Diaper Cover would make an adorable first Halloween costume!
Pattern Name: Baby Firefighter Sweater Designer: My Fingers Fly Free/Paid: Paid Skill Level: Intermediate Best For: The pattern is available in sizes: newborn to 3 month, 6-9 month, and 12-18 month sizes.
We can’t have a police officer costume without including an adorable little firefighter costume! This pattern by My Fingers Fly even includes instructions to create the rattle that looks like an axe. This would make a perfect costume for baby’s first Halloween!
Pattern Name: Dutton Hoodie Designer: Michelle at Two Brothers Blankets Free/Paid: Free Skill Level: Intermediate Best For: Children sizes 2-16
Another great option for crochet clothing for boys is this Dutton Hoodie by Michelle over at Two Brothers Blankets. The pattern is available in multiple sizes, and this would make a great gift for cold winter months!
Pattern Name: Hibernation Hoodie Designer: Heart Hook Home Free/Paid: Free Skill Level: Intermediate Best For: Child sizes ranging from 6-9 months to 12/14
Another wonderful clothing option for the winter months is this Hibernation Hoodie by Heart Hook Home. Made with Hygge yarn and adorable bear ears on the hood, this is one hoodie they’ll love to snuggle into!
Pattern Name: Boy’s Shawl-Collared Sweater Designer: Love Life Yarn Free/Paid: Both free and paid versions available Skill Level: Easy Best For: Pattern available in sizes 4,6,8, and 10
If you’re wanting to create a more classic crochet gift, look no further than this Boy’s Shawl-Collared Sweater by Love Life Yarn! This handsome sweater is crocheted using a cluster stitch, as well as some ribbing on the collar, sleeves, and hemline. This sweater is so adorable and looks perfect for a crisp fall day!
Best For: Children of all ages! The pattern is available in a wide variety of sizes, all the way up to adult sizes!
For those wanting to crochet a blanket for that little guy in your life, why not take a creative spin and create this Hooded Triceratops Dinosaur Blanket by Crafting Happiness? I absolutely love the fun and playfulness this pattern designer brought to this blanket!
Pattern Name: Building Blocks Throw Designer: Yarnspirations Free/Paid: Free Skill Level: Easy Best For: Gifting, room decor, children, babies, toddlers
When it comes to decorating a little boy (or girl!)’s room, you can’t go wrong with this Building Blocks Throw! It’s just too cute and a perfect staple for a nursery.
No kid’s room is complete without some adorable wall decor, and this Dinosaur Wall Holder fits the bill. This would make a perfect gift for a baby’s room!
Pattern Name: Soccer Ball Wall Hanging Organizer Designer: Planners Dreams Art Free/Paid: Paid Skill Level: Beginner-friendly Best For: Room decor
Another piece of crochet wall art ideas is this Soccer Ball Wall Hanging Organizer! This would make such a cute addition to any boy (or girl!)’s room. Organize their toys in style with this beautiful, beginner-friendly pattern!
What are some good crochet patterns for boys? Any crochet pattern could be a good pattern for boys! Crocheting is all about making something special for the people you love. Pick something they are interested in, and go for it! They’re sure to love it.
What can I crochet for a boy? You can crochet anything for a boy! Pick a theme or color the little boy in your life is into at the moment. Maybe bring one of his favorite characters to life!
What are some easy crochet patterns for boys? There are so many easy crochet patterns for boys available out there! Many beginner-friendly patterns are featured in this roundup.
What are good crochet gifts for boys? For a good crochet gift, think about the giftee. What characters do they like? Are they into dinosaurs? Cars? Monkeys? Whatever their favorite thing is, there are endless crochet patterns out there!
Are there free crochet patterns for boys? Yes, plenty! Many free crochet patterns are featured in this roundup.
What can I crochet for a teenage boy? Many of the patterns in this list are adaptable in size to crochet them for a teenager. If there’s something on here you like, chances are the pattern includes an option for teen sizes!
And that’s it for today’s roundup of crochet patterns for boys! All of these crochet pattern designers are truly talented, and I hope you found some inspiration for your next project! Which of these crochet patterns for boys is your favorite? Share below!
Save this roundup to Pinterest so you can come back when you’re ready for your next project!