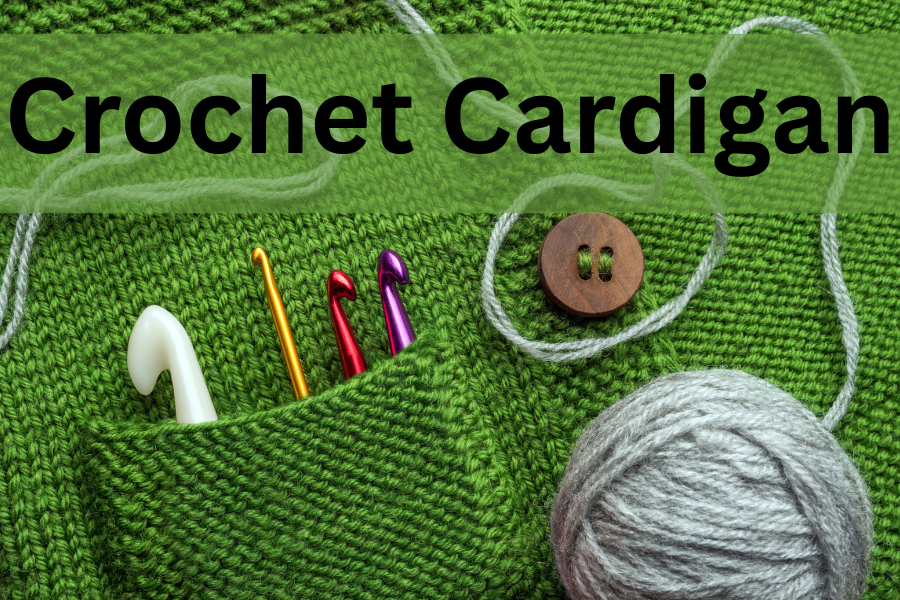
Crochet Ideas

Cozy Up With These 13 Stunning Fall Crochet Patterns

Cozy Up With These 13 Stunning Fall Crochet Patterns

  • Handmade Gifts & Decor With Fall Crochet
    • Crochet is the perfect way to welcome cooler weather! Create warm items for yourself and your loved ones. Whip up some fall crochet decor for the upcoming holidays!
  • Inspiring Color Palettes for Your Fall Crochet
    • From rusty oranges, vibrant golds, and deep forest greens to rich plums and milky creams, the beautiful colors of autumn inspire glorious fall crochet project colors! Create a cozy atmosphere at home with crochet decor using these colors.
  • Quick, Satisfying, and Fun Fall Projects
    • Many fall crochet patterns work up quickly, allowing you to create many of them in a short amount of time. Fill your home or make quick gifts with pumpkins, coasters, and other small accessories!

Autumn Morning Button Cowl

This beautiful Autumn Morning Button Cowl by Jennifer over at Fiber Flux is the perfect place to start for fall crochet projects. I love the lacy detail of the cozy wrap as well as the golden yellow color, perfect for crisp fall weather. She also offers the pattern as a paid PDF version as well as a YouTube tutorial.

Click here to get started!

Autumn Festival Beanie

This Autumn Festival Beanie by Lambent Crochet is the perfect addition to your fall wardrobe because the chunky yarn and rich colors add the perfect blend of cozy and fall together while keeping you warm and stylish! The pattern designer says this pattern works up quickly, making it a perfect addition to your fall crochet markets (or quick gifts!).

Find the pattern here.

Hygge Arrow Fingerless Gloves and Mittens

One of the best parts of the fall season is a fresh pair of cozy gloves. Crochet yourself a new pair with this lovely Hygge Arrow Fingerless Gloves and Mittens pattern by Rafaella over at Raffamusa Designs! The gloves feature a beautiful, intricate look thanks to the wrapped arrow stitch. Any pattern that includes versatility and customization options is always a bonus, and this pattern is available in three different sizes. She also includes the option to create fingerless gloves or mittens. Perfect!

Click here to get started.

Granny Stitch Pumpkin

There is something so classically beautiful about the granny stitch. It makes such a unique, lovely stitch, so it’s no surprise that crocheters like to incorporate it into nearly everything. These Granny Stitch Pumpkins by MJ’s Off The Hook Designs are no exception! The combination of the classic granny square stitch and the rich colors of teals, greens, browns, and creams create a rustic, cozy, fall style to die for! The addition of the cinnamon stick stems and the jute twine bows really adds a professional touch as well as an extra feeling of autumn.

Click here for the free pattern!

Pumpkin Crochet Mug Rug

There is just something so adorable about a mug rug. I have seen quite a few patterns for them, and they always inspire cozy, cottage vibes. This Pumpkin Crochet Mug Rug by Briana K. Designs is no exception! Add an extra dose of autumn comfort to your steaming mug of coffee or tea as you hunker down for the chilly months. For those of you skilled in both knit and crochet, she also offers a knitting pattern!

You can find the free patterns here.

Crochet Fall Garland

For a rustic, handmade touch to your fall decor, why not give this Crochet Fall Garland by Kim at The Caffeinated Snail a try? When decorating for the autumn season, placing pumpkins everywhere is pretty much mandatory. But I love how this garland incorporates acorns into the design as well. Acorns make me think of long walks through the woods of tall oak trees with brilliant red and yellow leaves. Plus, acorns are just so cute!

Click here to get the pattern!

Plaid Granny Square Blanket

Bringing it back to the granny squares! This Plaid Granny Square Blanket by Grace at Stitchberry is such a unique take on the classic granny square! I love that she has created a plaid pattern out of granny squares, and the warm fall colors give it such a snuggly and cozy feel. The pattern is free on her website, but you can also purchase a paid PDF version if you prefer.

Find them both here!

Fireside Blanket

This Fireside Blanket by Christine over at Spotted Horse Design Co is the perfect autumn blanket! The teal color really pops amongst the deep reds and golds in this pattern. The blanket gets its beautiful, unique look by crocheting the almond ridges stitch, and the bulky, chunky yarn she used brings the weight and warmth needed for a cozy autumn blanket! Whether you make this to cozy up around the campfire or just as a beautiful fall throw to hang over the couch, this one is a must-make!

Find the free pattern here.

Hello Autumn Blanket

This Hello Autumn Blanket by Little Duck Crochet is absolutely gorgeous! I love the intricate detail of the pumpkins, the stripes, the “Hello Autumn” text, and the striped border! I truly can’t stop admiring it. The colors all blend together to make this blanket a true spectacle. Wherever you put this one, it’s sure to be the center of attention!

Find the pattern on Etsy here.

Pumpkin Spice Throw Blanket

You could probably get me to buy pretty much anything as long as it had the words “Pumpkin Spice” in the title, so I definitely had to include this Pumpkin Spice Throw Blanket by Amanda Crochets in this roundup! Not only is it a gorgeous throw, but she says it is a beginner-friendly pattern as well! Crochet patterns that look much more difficult than they are tend to be some of the best projects. She also gives some instruction for how to create this throw in various sizes, so it’s customizable as well! In addition to a free pattern, she does also include a paid PDF version option as well.

Find them both here.

Last, but certainly not least, we’ve got some adorable fall crochet amigurumi patterns! This Turkey Amigurumi pattern by Stringy Ding Ding is a perfect way to add a cute and whimsical touch to your fall/Thanksgiving decor! She has the pattern available for free on her site, complete with lots and lots of pictures throughout, which is super helpful. She also offers an ad-free, paid PDF version if you prefer.

Find them both here.

Halloween Candy Corn

Nothing starts off spooky season quite like seeing candy corn hit the shelves! This iconic candy creates an adorable plushie perfect for gifts, seasonal craft fairs, or Halloween decor. Create a few of these Halloween Candy Corn plushies by My Favorite Patterns for a cute and fun Halloween display.

Find the pattern here!

Crochet Gnomes

The more I see various crochet gnome patterns on the web, the more I fall in love with them. They are all so unique and so dang adorable! That being said, this Crochet Gnome Tutorial by Back to Eden Crochet is a must-make for the upcoming fall season. The bulky, plushy yarn means these guys will work up quickly, and you’ll have these charming, mischievous gnomes to decorate with in no time!

Watch the YouTube video tutorial here.

Choosing the right yarn for your project can be a daunting task, especially with so many options out there to choose from. Bulky, chunky yarns can be used for blankets, scarves, cowls, etc, or for anything you want to give some extra bulk and warmth to. However, a nice, soft cotton or worsted weight yarn works for pretty much everything as well, so don’t shy away from these if you prefer to work with this kind of yarn. I sure do!

Also, don’t be afraid to mix and match from your current yarn stash. While I do love shopping for yarn for a new project, it can also be quite satisfying to craft something with yarn you already have lying around. Plus, if your stash runs out, it just means you need more yarn again and get to go shopping for it! Win-win.

Each designer of these beautiful patterns also listed the type of yarn they use in their instructions. I have listed the links for them below for easier browsing. Take a look through the various types of yarns and colors below, and see what sparks some inspiration!

Cozy Wool Yarn by Loops & Threads

Bernat Softee Chunky Solids (Super Bulky)

Brava Worsted Yarn

Mary Maxin Starlette Worsted Weight Yarn

Simple Alpaca by Knit Picks

Cascade Yarns

Wander Yarn

Paintbox Yarns

Stylecraft Special Aran

Premier Puzzle Yarn

And that’s our roundup of fall crochet patterns for the week! I hope these amazing patterns from all of these talented crochet pattern designers have inspired you to get your hook and get crafting for the fall season! I’m already dreaming of pumpkin spice…

What about you? Which of these patterns is your favorite? Which will you make first? Share in the comments below!

And stay cozy,

Voodoo Doll Crochet Pattern

fall-crochet-patterns-free

Cozy Up With These 13 Stunning Fall Crochet Patterns Read Post »

crochet-bag-charms
Crochet Ideas

10 Amazing Patterns for Crochet Bag Charms to Add Instant Charm!

Elevate your style with these cute and stylish patterns for crochet bag charms!

crochet-bag-charms

One of the best things about crochet is the endless possibilities to add a unique and customized touch to just about everything you own! With crochet bag charms, you can add some personality and expression to your bags, keys, or zippers, no matter your style.

Today’s post features a pattern roundup of some of the cutest crochet bag charms out there. Keep reading to gather some inspiration. Happy wishes and cozy stitches!


10 Amazing Patterns for Crochet Bag Charms to Add Instant Charm!


Why You’ll Love Making Crochet Bag Charms

  • Quick and Satisfying Crochet Project- Because crochet bag charms are small, you can crochet a bunch of them up in a jiffy! Talk about (pretty much) instant gratification.
  • Perfect for Craft Markets- Because they work up so quickly, you can make all sorts of crochet bag charms in a short amount of time, making this a perfect project to consider for your craft market!
  • Perfect for Using Up Scrap Yarn- The cute and small size of these crochet bag charms means you need less yarn to make them, which makes them a perfect project to use up your scrap stash.
  • Express Your Style With Unique Crochet Bag Charms- There is most likely a crochet pattern out there for pretty much anything you could ever dream up, meaning the possibilities to create a crochet charm that expresses your style and personality are endless!
  • They Make Fantastic Handmade Gifts- If there’s someone special in your life that would enjoy the cute, whimsical, personalization of a crochet bag charm, make them one as a gift! In my experience, crochet gifts are always welcomed and appreciated, and they are fun to make as well!

Animal Themed Crochet Bag Charms


Crochet Frog Bag Charm

This crochet frog bag charm by Tiny Miny Yarn is absolutely adorable! I love the cute pink cheeks. The best part of this pattern is that it doubles as a mini pouch, adding some extra organizational space to your bag. This would be great to use as a charm for a travel bag for crochet supplies. You could put some extra stitch markers, yarn needles, hooks, etc, in the pouch for easier access on the go.

Get the pattern here!

Various Animal Bag Charms

Okay, now this pattern is amazing, and I’m so glad I came across it in my searching! This crochet bag charm pattern by Chenda DIY offers a pattern to create a bee, pig, bear, and baby chick. But the best part is, the same pattern is used to make each animal, with only slight pattern variations and color changes for each. That makes it super simple! I also love that there is a video pattern available because sometimes that’s much easier to follow along with.

Get the free pattern here!

Turtle Key Chain

This crochet turtle key chain by Xuxu Crochet is to die for! I absolutely love it, and I think it would be such a cute way to adorn a beach/swimming bag. I may just have to make one! The best part is the pattern is free and available on YouTube, so you can follow along and whip one of these up in no time.

Click here to get started!

Whimsical Food and Drink Crochet Bag Charms

Strawberry Bag Charm

This strawberry key chain charm by The Lili Path is a must-make! I love its simple, yet adorable design. It’s sure to add a touch of sweetness and charm to any bag or keys you decorate it with! She explains the pattern is easy and works up quickly, making it a perfect beginner-friendly crochet pattern.

Get the free pattern here!

Crochet Pie Bag Charm

Okay, these little pie bag charms by Kukkacrochet By Putri are some of the cutest things I have ever seen. How adorable are these? These would make such a sweet addition to a bag or a set of keys. I just cannot get enough of them! Plus, the pattern is available as a YouTube video tutorial, so it’s more helpful for beginners.

Find the pattern here!

Crochet Cherry Bag Charm

Looks like we are featuring another crochet pattern by The Lili Path in this roundup, and for good reason! This cherry key chain/ bag charm is just too cute to not include. Cherries just seem to belong on everything, and I love anything with a cherry pattern. I especially like how she created the stem and leaves using a mint green color. That gives it such a unique and cute style.

Get the free pattern here!

Floral & Nature-Inspired Crochet Bag Charms


Bell Flower Bag Charm

Featuring yet another of The Lili Path’s spectacular designs, this bell flower bag charm had to be included! I love the beautiful simplicity of this pattern, and these flowers would be stunning hanging from any bag or keys! Again, she comes in with the mint green color of the stem and leaves, and again I find the effect amazing.

Get the free pattern here.

Flower Bag Charm

This flower bag charm by Danielle L Designs is fun, summery, and the smiley face just adds such a cheerful touch! The pattern can be used to create a bag charm, headphone accessory, or even a bookmark. Best of all, the pattern is available as a free YouTube video tutorial, making it easier for beginner crocheters to follow along.

Get the free pattern here!

Hibiscus

I love this hibiscus flower bag charm by Kukkacrochet By Putri. They really captured the tropical beauty of a hibiscus flower, and this would be adorable on a beach bag or a summer tote bag! The designer says the pattern is simple and very low-sew, which is music to my ears.

Click here for the free YouTube video tutorial!

Sunflower

Sunflowers are some of my favorite flowers because I love how sunny and happy they look. Freshly cut sunflowers in a vase bring such a cheery, summery feeling inside. So, it’s no surprise that I love this crochet sunflower bag charm by Molina DIY! The pattern is available as a YouTube video tutorial, making it easier for beginners to follow along with the pattern, which I love!

Click here for the pattern.

Types of Yarn to Use

Each crochet pattern listed above will list the type of yarn or yarns they used when creating their bag charms. However, depending on how much wear and tear it will be subjected to, you may want to consider using various yarns for your bag charm:

  • Cotton yarn will be more durable and could last longer
  • Acrylic yarn is softer and may fray or show wear faster and easier.

You should also consider using a smaller/thinner weighted yarn and smaller hook to create even smaller versions of each bag charm. Adorable!

Start Hooking Your Favorite Crochet Bag Charms Today!

There are so many crochet patterns out there to make any crochet bag charm match any style. With just a few steps, some yarn, and a hook, just imagine all the ways you can express your personality by adding charms to keys, zippers, backpacks, tote bags, purses, and anything else you can think of! I hope you found some inspiration in today’s pattern roundup by all these lovely and talented crochet pattern designers.

Which one will you make? Share below in the comments!

And stay cozy,

This post was all about a pattern roundup for crochet bag charms.

easy-crochet-bag-charms

10 Amazing Patterns for Crochet Bag Charms to Add Instant Charm! Read Post »

crochethackysack
Free Patterns

Kick Up Some Fun With This Free Crochet Hacky Sack Pattern!

Discover the joy of a handmade crochet hacky sack! I remember the days of playing on the playground during recess, and there was always at least one group of kids passing a hacky sack around, expertly keeping it from hitting the ground. Today, let’s bring back those childhood memories and make our own hacky sack!

crochethackysack

There is something so special about creating your own gifts or toys for those you love. This crochet hacky sack is a portable, versatile, beginner-friendly project that works up in the blink of an eye. The possibilities for color customization and pattern designs are only as limited as your imagination. Best of all, it’s fun for all ages! Let’s jump in. Happy wishes and cozy stitches!

This post is about a free crochet hacky sack pattern.

Kick Up Some Fun With This Free Crochet Hacky Sack Pattern!


Why Crochet Your Own Hacky Sack?

With all the options out there for hacky sacks, you may be wondering why you should bother creating your own. While there are many options to purchase inexpensive hacky sacks, there is something so fun and satisfying about making something yourself. But here are a few more reasons why you should give it a go!

  • Scrap Buster-  I love any project that can help clean out the stash of scrap yarn leftover from various projects, and these crochet hacky sacks are no exception! Pull out that stash and get hooking!
  • Beginner Friendly- If you are brand new to the crochet world and want an easy project for one of your first, this one is perfect! All we are going to do is create a sphere and fill it, making it one of the easiest, quickest projects out there.
  • Satisfyingly Fast Project- Intensive, intricate crochet projects are great, but there is nothing quite like being able to crochet something from start to finish in 30 minutes or so.
  • Great Gift Idea/Stocking Stuffer- Because they work up so quickly, you could create a lot of them in a short amount of time! They make excellent gift ideas to bring a little nostalgia to the ones you love.

Crochet Hacky Sack Pattern

My patterns and pictures are for PERSONAL USE only. Please do not share, distribute, reproduce, publish, translate, alter, or resell this pattern in any way. Feel free to share or sell the finished product as long as you credit my design. Please share photos of your project with me by tagging me here on Instagram if you’d like. I love to see them!

Materials You’ll Need to Crochet Your Hacky Sack:

  • Worsted weight yarn in any color(s) you choose.
  • 3.5 mm crochet hook. I am currently using the Tulip Etimo 3.5 mm Crochet Hook.
  • Dry lentils, rice, or beans to fill the hacky sacks
  • Yarn needle
  • Stitch marker
  • Scissors

Crochet Abbreviations for Your Hacky Sack:

  • MR- Magic Ring
  • Sc- Single Crochet
  • Inc- Increase
  • Dec- Decrease
  • St(s)- Stitch(es)
  • FO- Fasten Off
  • Sl St- Slip Stitch

Step-By-Step Instructions:

1. MR 6(6)
2. Inc x 6(12)
3. Inc x 12(24)
4. 2 sc, inc x 8(32)
5-11. Sc around(32)
12. 2 sc, dec x 8(24)
* Fill to desired firmness. Don’t stuff it all the way full though!
13. Dec x 12(12)
14. Dec x 6(6)
*FO and leave a long tail. With a yarn needle, pass the tail through each of the remaining 6 stitches. Pull tight to close.

crochethackysackdiy

And that’s really all there is to it! You could make as many of these as colors you have on hand! Simple, fast, fun!

But the possibilities are endless for the designs you could create for these!

Variations:

There are so many possibilities to customize the color and pattern to make your hacky sack truly unique:

Stripes

crochethackysacktutorial

Materials Needed:

  • Worsted weight yarn in any color(s) you choose.
  • 3.5 mm crochet hook. I am currently using the Tulip Etimo 3.5 mm Crochet Hook.
  • Dry lentils, rice, or beans to fill the hacky sacks
  • Yarn needle
  • Stitch marker
  • Scissors

Crochet Abbreviations for Your Hacky Sack:

  • MR- Magic Ring
  • Sc- Single Crochet
  • Inc- Increase
  • Dec- Decrease
  • St(s)- Stitch(es)
  • FO- Fasten Off
  • Sl St- Slip Stitch

Step-By-Step Instructions:

In Color A:
1. MR 6(6)
2. Inc x 6(12)
Switch to Color B
3. Inc x 12(24)
4. 2 sc, inc x 8(32)
Switch to Color A
5-6. Sc around(32)
Switch to Color B
7-8. Sc around(32)
Switch to Color A
9-10. Sc around(32)
Switch to Color B
11. Sc around(32)
12. 2 sc, dec x 8(24)
Switch to Color A
13. Dec x 12(12)
14. Dec x 6(6)
FO, and leave a long tail. With a yarn needle, pass the tail through each of the remaining 6 stitches. Pull tight to close.

Monster Hacky Sack

howtomakeacrochethackysack

howtocrochethackysack

Materials Needed:

  • Worsted weight yarn in any color(s) you choose.
  • 3.5 mm crochet hook. I am currently using the Tulip Etimo 3.5 mm Crochet Hook.
  • Dry lentils, rice, or beans to fill the hacky sacks
  • 8 mm safety eyes
  • Yarn needle
  • Stitch marker
  • Scissors

Crochet Abbreviations for Your Hacky Sack:

  • MR- Magic Ring
  • Sc- Single Crochet
  • Inc- Increase
  • Dec- Decrease
  • St(s)- Stitch(es)
  • FO- Fasten Off
  • Sl St- Slip Stitch
  • BO- Bobble Stitch- See Special Stitch Instructions

Special Stitch Instructions:

To create a bobble stitch, insert your hook into the stitch, yarn over, insert your hook into the same stitch and draw up a loop. Yarn over and insert your hook into the same stitch 3 more times. On the last one, yarn over and pull through all loops on the hook.

Instructions:

1. MR 6(6)
2. Inc x 6(12)
3. Inc x 12(24)
4. 2 sc, inc x 8(32)
5-6. Sc around(32)
7. 12 sc, BO, 6 sc, BO, 12 sc(32)
8-11. Sc around(32)
12. 2 sc, dec x 3, 1 sc, BO, dec, 2 sc, dec,1 sc, BO, dec, [2 sc, dec] x2(24)
*Insert safety eyes between rounds 5-6, about 1-2 stitches apart. You just want them centered between the arms!
13. Dec x 12(12)
*Fill to desired fullness. Try not to stuff it all the way full.
14. Dec x 6  (6)
FO, and leave a long tail. With a yarn needle, pass the tail through each of the remaining 6 stitches. Pull tight to close.

And that’s it! Now, you can create an endless amount of crochet hacky sacks for yourself, or you can gift them out. The next time you are trying to decide what to do with your scrap yarn pile, give one of these a try!

What about you? Have you made any of these crochet hacky sacks? Share below!

And stay cozy,

This post contains a free crochet hacky sack pattern.

Related Posts:

15 Best Crochet Patterns for Boys: Crochet His Next Favorite Thing!

crochethackysackpattern

Kick Up Some Fun With This Free Crochet Hacky Sack Pattern! Read Post »

Free Patterns

Crochet Hand Position: Different Ways to Crochet!

When you are new to crochet, you may be wondering: what is the correct way to hold a crochet hook? What should my hand position look like? This week, we’re going to talk about crochet hand positions!

crochethandposition

In the world of crochet, you will find so much versatility. From the way crochet pattern designers write and format their patterns to the preferences for types of yarn or how to hold a crochet hook, there will never be a shortage of differences in your pursuit of learning crochet. While it’s important to understand the variations and acknowledge the differences in other crocheters’ preferences, keep in mind that whatever feels right to you is the right way! Today, though, let’s dive into the crochet hand positions you may come across as you’re learning. Happy wishes and cozy stitches!

This post is all about crochet hand positions.

Crochet Hand Position: Different Ways to Crochet!

Crochet Hooks

First, let’s talk about crochet hooks. There are so many different kinds of crochet hooks out there, and they range from very inexpensive to ridiculously expensive. It can be overwhelming to choose the best crochet hooks when you are just starting out. Well, I’m here to tell you: go cheap!

You don’t need the fanciest crochet hooks on the market to learn to crochet. In fact, you should do the opposite! You can buy a set of Boye or Susan Bates aluminum crochet hooks for a small investment. As you build your crochet skills, you can gradually add more expensive crochet hooks into your collection. Or don’t! Honestly, some of my favorite crochet hooks to this day are the cheap Susan Bates ones I learned on.

You can find the Susan Bates aluminum hooks here.

You can find the Boye aluminum hooks here.

Knives Up, or Pencils Down! The Two Main Hand Positions

When learning to crochet, there are two main ways to hold a crochet hook that you will come across. The first position is the “knife” position, and the second is the “pencil” position. As their names suggest, these positions describe the way your hand position resembles the way you hold a knife or a pencil.

Knives Up

knifeholdcrochet

As you can see in the image above, the crochet hook is held between the thumb and index finger, with the hook end pointing up toward the ceiling.

This is the “knife” hold or hand position.

differentwaystoholdacrochethook

The knife hold looks a lot like this picture here!

Pencils Down

crochethandpositionforbeginnersstepbystep

As you can see in the picture above, the crochet hook is held with the hook end pointed down, similar to the way you hold a pencil.

pencilholdcrochet


The ways in which the crochet hook can be held are as vast and varied as the crocheters themselves! I have seen some very creative and interesting ways people have come up with to handle their hook. However, these are the two main crochet hand positions people stick to, with maybe some minor variations between them.

Chances are, you will most likely hold the crochet hook the way the person who taught you to crochet holds their hook. For example, my mother taught me to crochet when I was young, and she held her crochet hook in the knife position. As a result, I used this crochet hand position for every project when I was first learning to crochet, and it is still my most preferred method today.

However, no matter which way you learn, try them both! You may find that you prefer one crochet hand position over the other. Some people can even comfortably switch back and forth between the two positions.

While you will come across many different ways to hold your crochet hook and yarn, keep in mind that, at the end of the day, the way that feels the most comfortable to you is the only right way! That’s one of the beautiful things about crochet. We all do it a little bit differently, but we can all create absolute magic by tying knots into yarn with a hook.

What is your preferred crochet hand position? Share below!

And stay cozy,

This post was all about crochet hand positions.


Check out these free crochet patterns to try out these crochet hand positions!

Crochet Elephant Pattern

Crochet Hair Bow Pattern

Tiny Top Hat Fun: Amigurumi Crochet Top Hat Pattern!

Rustic Crochet Toilet Paper Cover: Free Pattern!

crochethandpositionforbeginners

Crochet Hand Position: Different Ways to Crochet! Read Post »

Free Patterns

Free Crochet Towel Holder Pattern!

There is something so comforting and cozy about being able to make things for our homes. With just a ball of yarn and a hook, the possibilities of kitschy, charming touches to our homes are positively endless. Today, I’ve made a crochet towel holder.

crochet towel holder

This crochet towel holder incorporates the beautiful open shell and picot stitch to create the towel holder. I love any stitch that has a more open, lacy weave, and I can’t wait to share this pattern with you!

This pattern works up quickly, making it the perfect project to add a quick, homey touch to your kitchen or for gift giving, and I just love the comfy, cozy feel it brings to the kitchen.

Happy wishes and cozy stitches!

My patterns and pictures are for PERSONAL USE only. Please do not share, distribute, reproduce, publish, translate, alter, or resell this pattern in any way. Feel free to share or sell the finished product as long as you credit my design. Please share photos of your design with me by tagging me here on Instagram if you’d like. I love to see them!

Now, let’s get started!

This post is for a free crochet towel holder pattern.

Free Crochet Towel Holder Pattern

Supplies You Will Need:

  • Crochet hook: 5.00 mm
  • Worsted weight yarn in any color(s) you choose
  • 4 ” wooden rings (I found mine on Amazon)
  • Yarn needle
  • Stitch marker
  • Scissors

Crochet Abbreviations:

  • Inc- Increase
  • Dec- Decrease
  • Ch- Chain
  • Sc- Single Crochet
  • St(s)- Stitch(es)
  • Sl st- Slip Stitch
  • FO- Fasten Off
  • Dc- Double Crochet
  • Tr- Treble Crochet

Towel Holder

1. Sc 21 stitches around the wooden ring. Ch 1 and turn.

free toilet roll cover patterns

2. Sc in first stitch, *skip 2 sc, [1 dc, ch 1, 1 dc, ch 1, 1 dc] in next sc, skip 2 sc, 1 sc in next st, ch 3, 1 sc in next st**.

Repeat from * to ** one more time, then: skip 2 sc, [1 dc, ch 1, 1 dc, ch 1, 1 dc] in next st, skip 2 sc, sc in last stitch, turn

free crochet towel holder

3. Ch 7 (this will count as a tr and 3 ch), *[1sc, ch 3, 1 sc] in middle dc of shell (this is one picot stitch), ch 3, 1 dc in next ch 3 arch, ch 3**.

Repeat from * to ** once more, then: [1 sc, ch 3, 1 sc] (picot) in middle dc of next shell, ch 3, skip next dc, tr in last stitch, turn

easy crochet towel holder

4. Ch 1, 1 sc in tr, *skip next ch 3 space, [1dc, ch 1, 1 dc, ch 1, 1 dc] in center of next picot stitch, skip next ch 3 space, [1 sc, ch 3, 1 sc] (picot) in next dc**

Repeat from * to ** once more, then: skip next ch 3 space, [1 dc, ch 1, 1 dc, ch 1, 1 dc] in next picot stitch, sc in 4th ch of the ch 7, turn

crochet kitchen towel holder free pattern

Basically, we are now going to repeat Row 3 and 4 until we reach the desired length. This stitch seems more confusing than it is, I promise! Once you grasp these two steps, you will master this stitch in no time.

5. Repeat Row 3

6. Repeat Row 4

7. Repeat Row 3

8. Repeat Row 4

You can make the length as long or as short as you like. If you’d like to make your towel holder longer, continue alternating repeat rows of 3 and 4 until you reach the desired length. Be sure to end on a “Row 4” repeat to keep the finished folded length even.

Finishing Up:

Now, we just need to sew the other end of our crochet towel holder to the second wooden ring!

  • Cut a length of yarn that is at least 30 inches in length and pull the last stitch of the last round through to secure.
  • With a yarn needle, wrap the yarn around the wooden ring, and pass it through each stitch along the last row. Keep the stitches around the ring tidy and pulled tightly as you work.
  • Weave in all loose ends

And there we have it! A super simple, super customizable and versatile crochet towel holder! Wrap it around your fridge handle, your oven, a towel rack, or whatever!

I love the lacy, cottage look of the open shell and picot stitch, and I love the touch it brings to my kitchen. I’ll definitely be making some of these as gifts as well!

What about you? Have you made one of these crochet towel holders? Share below!

And stay cozy,

This post was for a free crochet towel holder pattern.

Check out my related posts below for more crochet home decor!

Related Posts

crochet towel holder with wooden ring pattern


Free Crochet Towel Holder Pattern! Read Post »

Scroll to Top