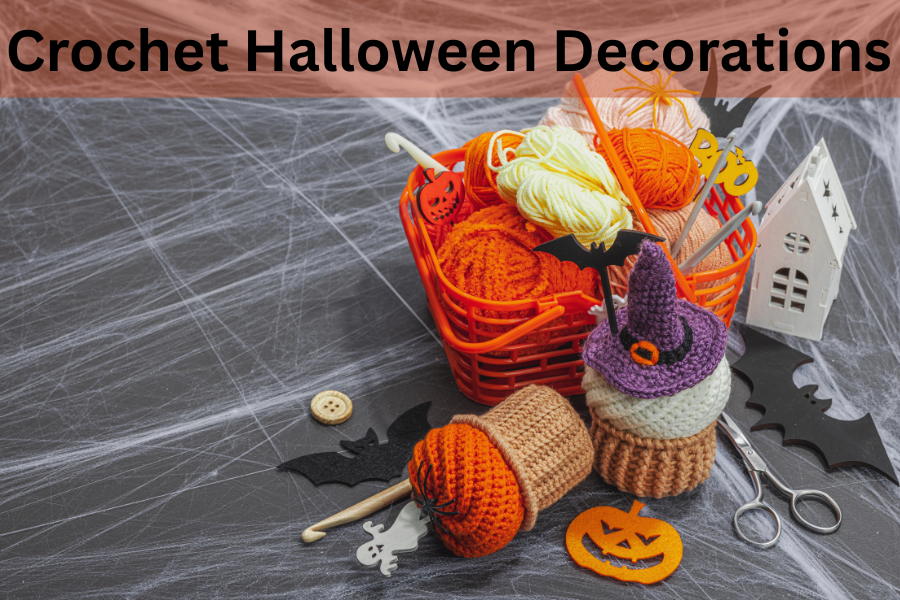
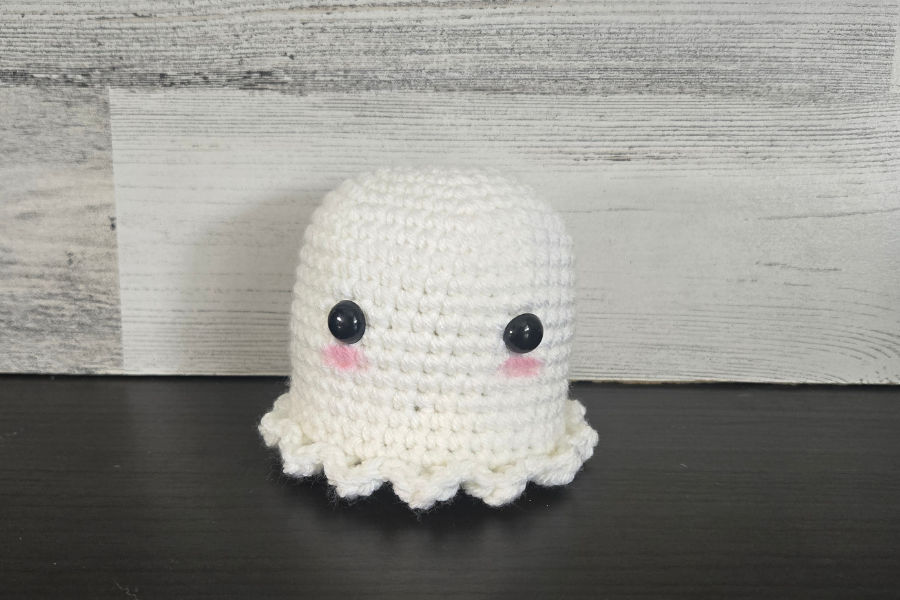
Hauntingly Adorable! Your FREE Crochet Halloween Ghost Pattern
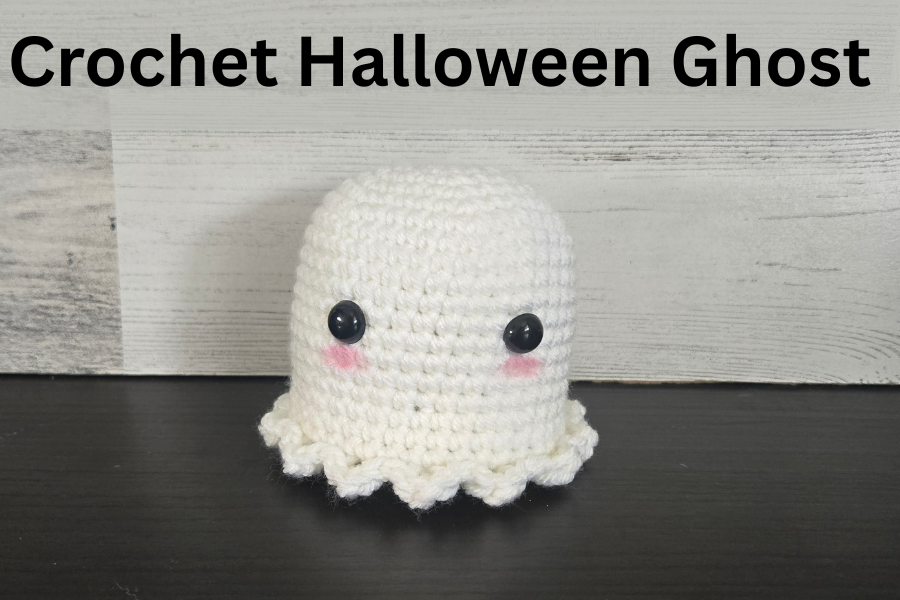
Are you ready to add a friendly spook to your home this Halloween? Meet your new favorite free crochet Halloween ghost! This little guy is super cute and works up quickly, so you can make plenty for your home, friends, or even for a Halloween market! Along with the free crochet Halloween ghost pattern, I have also included some instructions for pattern variations, such as a witch ghost, candy corn ghost, and a zombie ghost so you can customize your new spooky friend to your heart’s content.
Happy wishes and cozy stitches!
My patterns and pictures are for PERSONAL USE only. Please do not share, distribute, reproduce, publish, translate, alter, or resell this pattern in any way. Feel free to share or sell the finished product as long as you credit my design. Please share photos of your project with me by tagging me here on Instagram if you’d like. I love to see them!
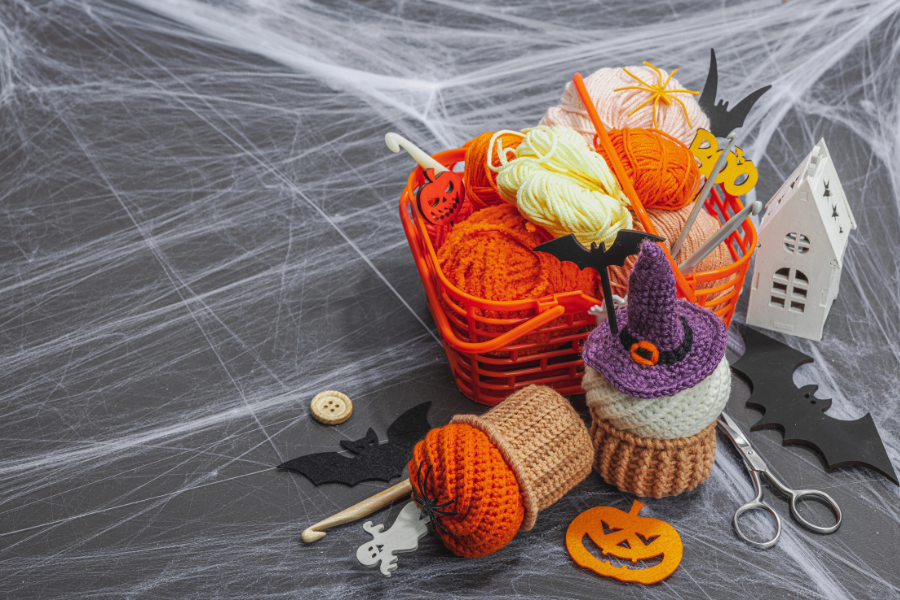
This post features a free crochet Halloween ghost pattern.
To purchase a downloadable PDF version of this pattern, click here!
Free Crochet Halloween Ghost Pattern
Because this ghost has basic stitches, a round shape, and minimal sewing, it’s a perfect crochet pattern for beginners. Plus, it works up so quickly that, even as a newcomer to amigurumi, you will have it finished in no time! Let’s get started.
Materials You’ll Need to Crochet Your Halloween Ghost
- Worsted weight yarn in white
- 3.5 mm crochet hook. I am currently using the Tulip Etimo 3.5 mm Crochet Hook.
- 12 mm safety eyes
- Polyfill
- Yarn needle
- Stitch marker
- Scissors
Crochet Abbreviations
- MR- Magic Ring
- Sc- Single Crochet
- HDC- Half Double Crochet
- DC- Double Crochet
- BLO: Back Loop Only
- Inc- Increase
- Dec- Decrease
- St(s)- Stitch(es)
- FO- Fasten Off
- Sl St- Slip Stitch
Step-by-Step Instructions
| In white: | |
| 1. MR 6 | (6) |
| 2. Inc x 6 | (12) |
| 3. 1 sc, inc x 6 | (18) |
| 4. 2 sc, inc x 6 | (24) |
| 5. 3 sc, inc x 6 | (30) |
| 6. 4 sc, inc x 6 | (36) |
| 7. 5 sc, inc x 6 | (42) |
| 8-19. Sc around | (42) |
| 20. BLO: Sc around. | (42) |
| 21. 5 sc, dec x 6 | (36) |
| 22. 4 sc, dec x 6 | (30) |
| 23. 3 sc, dec x 6 | (24) |
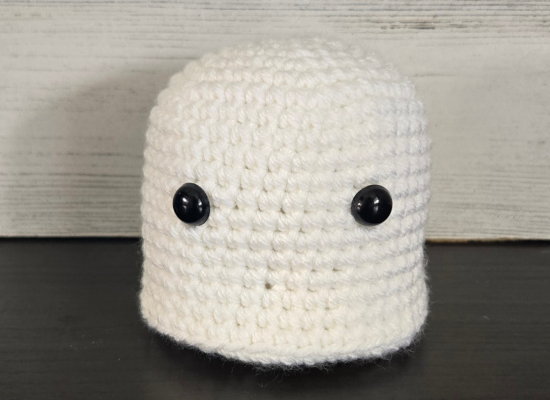
| *Place safety eyes between Rounds 12 and 13, 7 sts apart. *Stuff, and keep stuffing as you close | |
| 24. 2 sc, dec x 6 | (18) |
| 25. 1 sc, dec x 6 | (12) |
| 26. Dec x 6 | (6) |
| *FO, leaving a long tail. Pass the tail through each stitch with a yarn needle. Pull tight to close, and weave in end. | |
| *Attach to any stitch in Round 20 with a sl st. Continue below: | |
| 1. [HDC, DC, HDC] in same stitch, sl st in next 2 sts, [HDC, DC, HDC] in next st. | |
| *Repeat around, joining to beginning st with a sl st. | |
| *FO. Weave in ends. | |
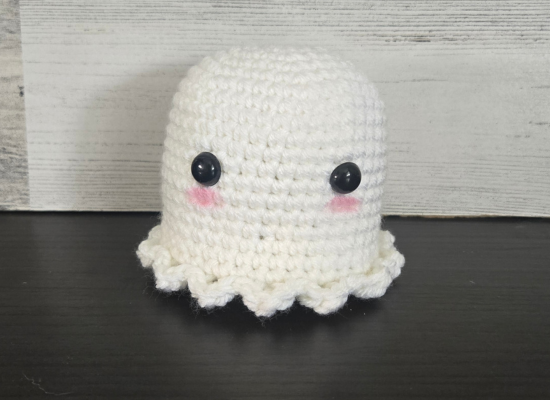
| *Add a little blush to his cheeks with a small brush and some pink eye shadow or blush! |
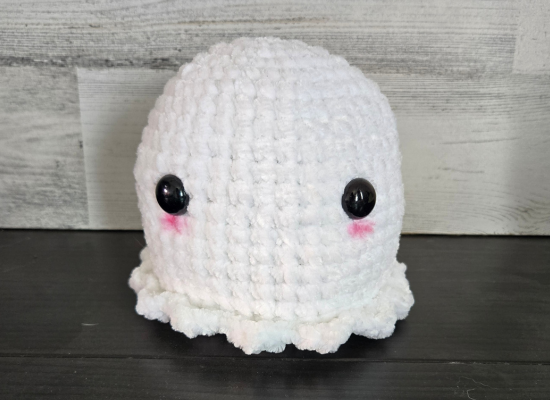
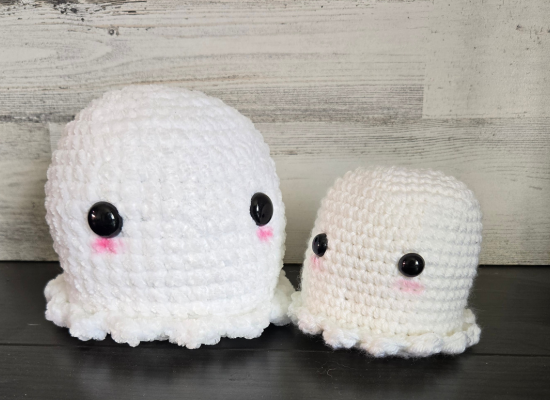
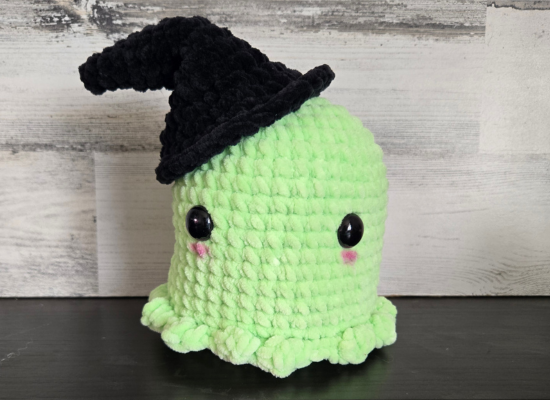
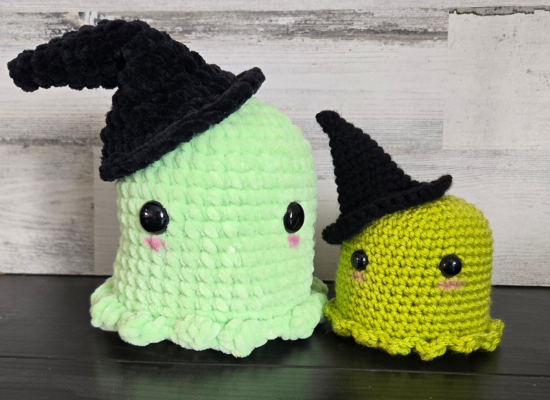
And here he is in a plushy version! *For this version, I followed the steps above, but I used a 6mm hook and Premier Chunky Parfait in White.
And that’s really all there is to it! Quick, easy, fun, and cute! Now, make yourself up a bunch of these, or continue down below to see instructions for different variations.
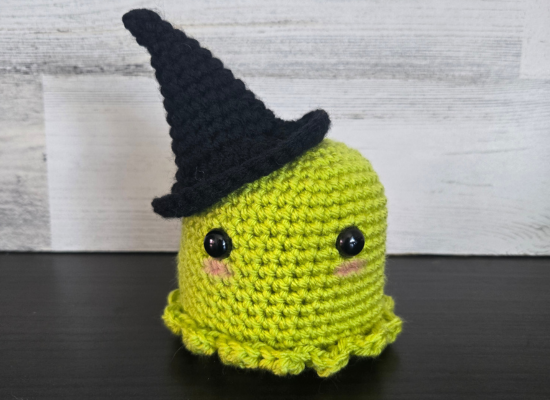
Crochet Witch Ghost
Materials You’ll Need to Crochet Your Witch Ghost
- Worsted weight yarn in black and green
- 3.5 mm crochet hook. I am currently using the Tulip Etimo 3.5 mm Crochet Hook.
- 12 mm safety eyes
- Polyfill
- Yarn needle
- Stitch marker
- Scissors
Crochet Abbreviations
- MR- Magic Ring
- Sc- Single Crochet
- HDC- Half Double Crochet
- DC- Double Crochet
- BLO- Back Loop Only
- FLO- Front Loop Only
- Inc- Increase
- Dec- Decrease
- St(s)- Stitch(es)
- FO- Fasten Off
- Sl St- Slip Stitch
Step-by-Step Instructions:
| In green: | |
| 1. MR 6 | (6) |
| 2. inc x 6 | (12) |
| 3. 1 sc, inc x 6 | (18) |
| 4. 2 sc, inc x 6 | (24) |
| 5. 3 sc, inc x 6 | (30) |
| 6. 4 sc, inc x 6 | (36) |
| 7. 5 sc, inc x 6 | (42) |
| 8-19. Sc around | (42) |
| 20. BLO: sc around | (42) |
| 21. 5 sc, dec x 6 | (36) |
| 22. 4 sc, dec x 6 | (30) |
| 23. 3 sc, dc x 6 | (24) |
| *Insert safety eyes between Rounds 12 and 13, 7 sts apart. *Stuff | |
| 24. 2sc, dec x 6 | (18) |
| 25. 1 sc, dec x 6 | (12) |
| 26. dec x 6 | (6) |
| *FO, leaving a long tail. Pass the tail through each stitch with a yarn needle. Pull tight to close, and weave in end. | |
| *Attach to any stitch in Round 20 with a sl st. Continue below: | |
| 1. [HDC, DC, HDC] in same stitch, sl st in next 2 sts, [HDC, DC, HDC] in next st. | |
| *Repeat around, joining to beginning st with a sl st. | |
| *FO, weave in ends. |
Witch Hat
| In black: | |
| 1. MR 4 | (4) |
| 2. Sc around | (4) |
| 3. 1 sc, inc x 2 | (6) |
| 4. Sc around | (6) |
| 5. 1 sc, inc x 3 | (9) |
| 6. Sc around | (9) |
| 7. 2 sc, inc x 3 | (12) |
| 8. Sc around | (12) |
| 9. 3 sc, inc x 3 | (15) |
| 10. 4 sc, inc x 3 | (18) |
| 11. 5 sc, inc x 3 | (21) |
| 12. 6 sc, inc x 3 | (24) |
| 13. FLO: 3 sc, inc x 6 | (30) |
| 14. 4 sc, inc x 6 | (36) |
| 15-16. Sc around | (36) |
| *FO, leaving a long tail. Sew hat to head. |
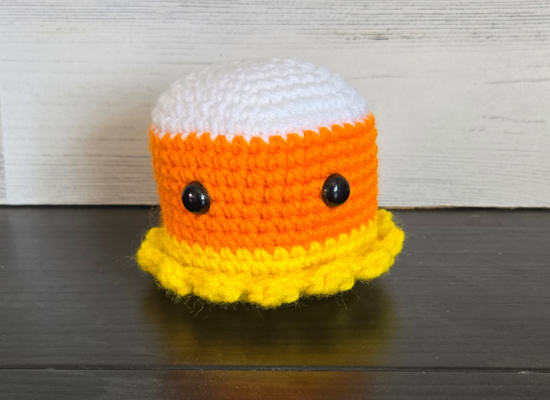
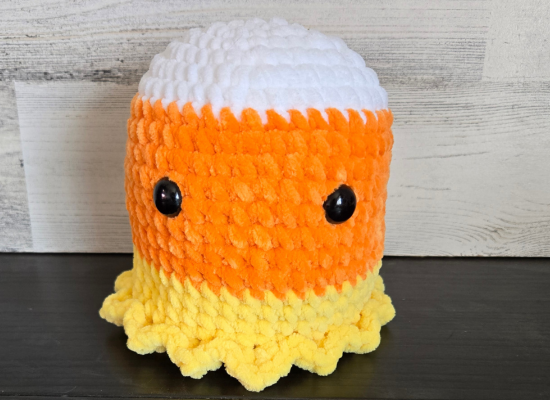
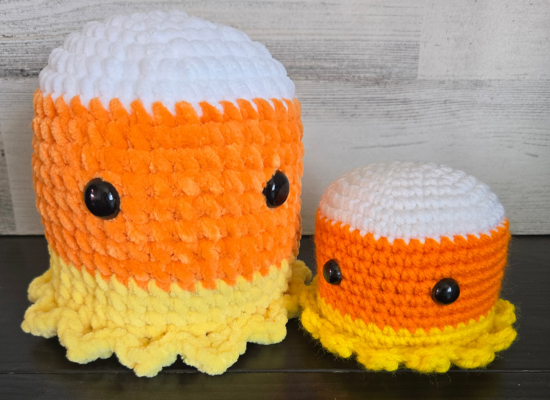
Candy Corn Ghost
Materials You’ll Need to Crochet Your Candy Corn Ghost
- Worsted weight yarn in orange, yellow, and white
- 3.5 mm crochet hook. I am currently using the Tulip Etimo 3.5 mm Crochet Hook.
- 12 mm safety eyes
- Polyfill
- Yarn needle
- Stitch marker
- Scissors
Crochet Abbreviations
- MR- Magic Ring
- Sc- Single Crochet
- HDC- Half Double Crochet
- DC- Double Crochet
- BLO- Back Loop Only
- Inc- Increase
- Dec- Decrease
- St(s)- Stitch(es)
- FO- Fasten Off
- Sl St- Slip Stitch
Step-by-Step Instructions:
| In white: | |
| 1. MR 6 | (6) |
| 2. inc x 6 | (12) |
| 3. 1 sc, inc x 6 | (18) |
| 4. 2 sc, inc x 6 | (24) |
| 5. 3 sc, inc x 6 | (30) |
| 6. 4 sc, inc x 6 | (36) |
| 7. 5 sc, inc x 6 | (42) |
| 8. Sc around | (42) |
| *Switch to orange | |
| 9-16. Sc around | (42) |
| *Switch to yellow | |
| 17-19. Sc around | (42) |
| 20. BLO: sc around | (42) |
| 21. 5 sc, dec x 6 | (36) |
| 22. 4 sc, dec x 6 | (30) |
| 23. 3 sc, dc x 6 | (24) |
| *Insert safety eyes between Rounds 12 and 13, 7 sts apart. *Stuff | |
| 24. 2sc, dec x 6 | (18) |
| 25. 1 sc, dec x 6 | (12) |
| 26. dec x 6 | (6) |
| *FO, leaving a long tail. Pass the tail through each stitch with a yarn needle. Pull tight to close, and weave in end. | |
| *With yellow, attach to any stitch in Round 20 with a sl st. Continue below: | |
| 1. [HDC, DC, HDC] in same stitch, sl st in next 2 sts, [HDC, DC, HDC] in next st. | |
| *Repeat around, joining to beginning st with a sl st. | |
| *FO, weave in ends. |
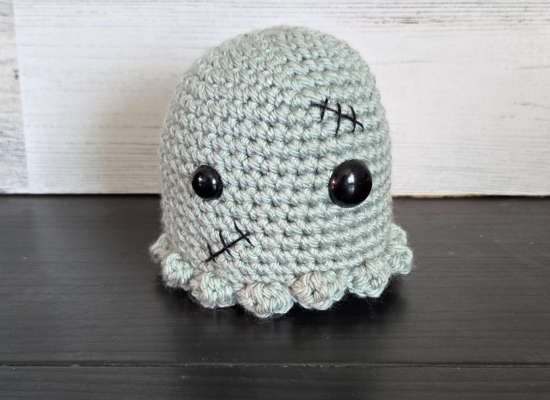
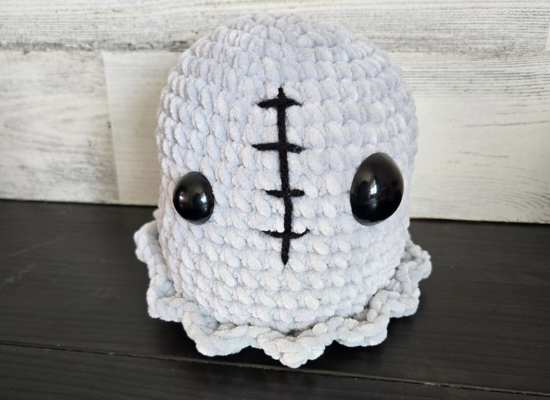
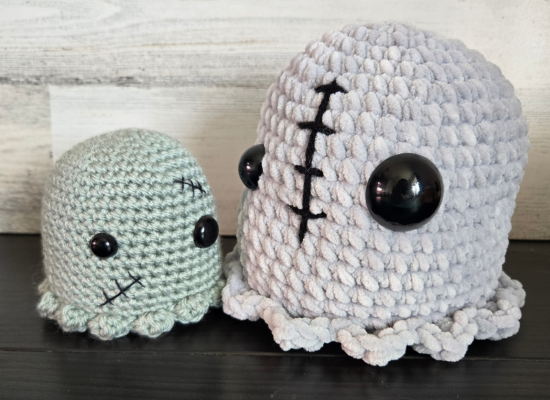
Zombie Ghost
Materials You’ll Need to Crochet Your Zombie Ghost
- Worsted weight yarn in green or gray.
- Black embroidery thread
- Sewing needle
- 3.5 mm crochet hook. I am currently using the Tulip Etimo 3.5 mm Crochet Hook.
- Safety eyes in two different sizes. I like to buy a variety pack, like this one here.
- Polyfill
- Yarn needle
- Stitch marker
- Scissors
Crochet Abbreviations
- MR- Magic Ring
- Sc- Single Crochet
- HDC- Half Double Crochet
- DC- Double Crochet
- BLO- Back Loop Only
- Inc- Increase
- Dec- Decrease
- St(s)- Stitch(es)
- FO- Fasten Off
- Sl St- Slip Stitch
Step-by-Step Instructions:
| In green or gray: | |
| 1. MR 6 | (6) |
| 2. inc x 6 | (12) |
| 3. 1 sc, inc x 6 | (18) |
| 4. 2 sc, inc x 6 | (24) |
| 5. 3 sc, inc x 6 | (30) |
| 6. 4 sc, inc x 6 | (36) |
| 7. 5 sc, inc x 6 | (42) |
| 8-19. Sc around | (42) |
| 20. BLO: sc around | (42) |
| 21. 5 sc, dec x 6 | (36) |
| 22. 4 sc, dec x 6 | (30) |
| 23. 3 sc, dc x 6 | (24) |
| *Insert safety eyes between Rounds 12 and 13, 7 sts apart. I like to put the smaller eye on the left, and the bigger eye on the right and one row above. *Stuff | |
| 24. 2sc, dec x 6 | (18) |
| 25. 1 sc, dec x 6 | (12) |
| 26. dec x 6 | (6) |
| *FO, leaving a long tail. Pass the tail through each stitch with a yarn needle. Pull tight to close, and weave in end. | |
| *Attach to any stitch in Round 20 with a sl st. Continue below: | |
| 1. [HDC, DC, HDC] in same stitch, sl st in next 2 sts, [HDC, DC, HDC] in next st. | |
| *Repeat around, joining to beginning st with a sl st. | |
| *FO, weave in ends. |
So, which of these crochet Halloween ghosts will you make first? Let us know in the comments below!
And stay cozy,

Related Posts:
Spooktacular Stitches: 20 Free Crochet Halloween Decorations!
Cozy Up With These 13 Stunning Fall Crochet Patterns
Voodoo Doll Crochet Pattern
This post featured a free crochet Halloween ghost pattern.
Hauntingly Adorable! Your FREE Crochet Halloween Ghost Pattern Read Post »