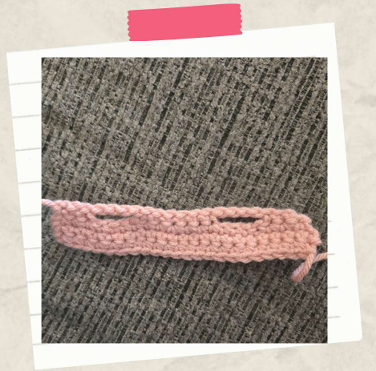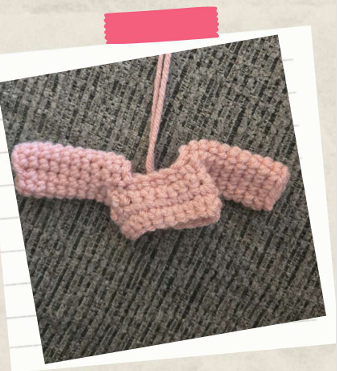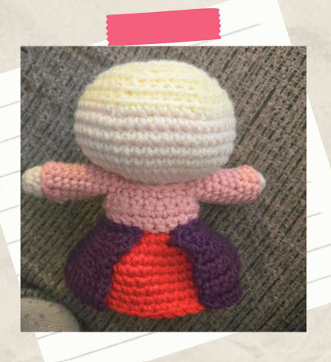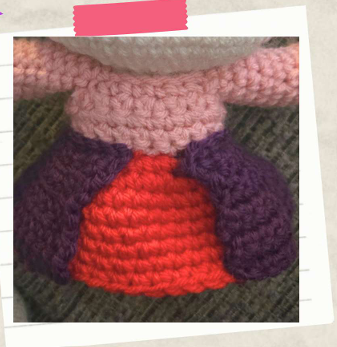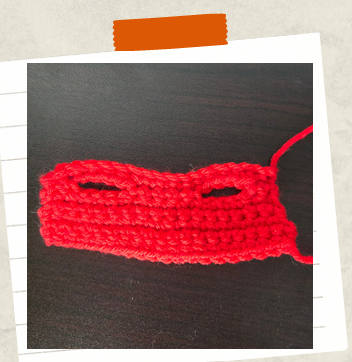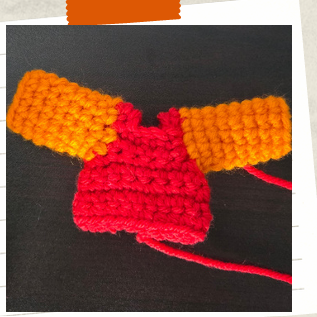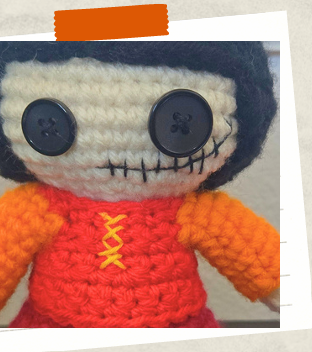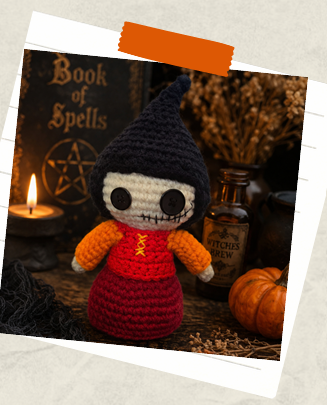
Free Patterns

Free Patterns

Fun and Easy Crochet Keychain for Beginners (Free Pattern)

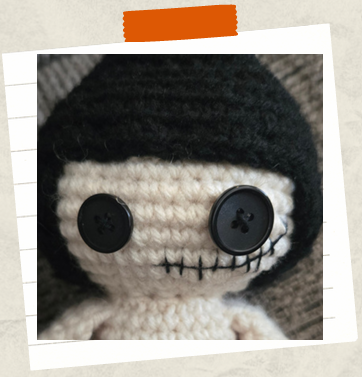
Easy crochet keychain for beginners featuring a mini poppet amigurumi doll with button eye and stitched details.

Are you ready to take your crochet skills to the next (smaller) level? Are you a newbie crocheter looking to make an easy crochet keychain for beginners? Well, look no further! I’ve got the perfect free pattern to create tiny, whimsical poppets that are perfect for your backpacks, bags, purses, or keys. Keep scrolling for the easy, beginner-friendly free pattern below!

Happy wishes and cozy stitches!

This pattern is for a free easy crochet keychain for beginners pattern.

What Makes This Pattern Fun?

  • Beginner-friendly- Even the newest crocheters can tackle this one! If you can crochet in the round, you can make an adorable poppet keychain.
  • Quick to make- These little guys are TINY, and they work up quickly!
  • Great stash buster- Got some scrap yarn laying about that you don’t know what to do with? Grab it and try out this pattern!
  • Perfect handmade gift- Because they work up quickly and don’t take up a lot of space, I consider these to be perfect for gifting or for selling at markets!
  • Fully customizable- From the size and color of the yarn, to the types of eyes and stitches you adorn your mini poppet with, the possibilities are endless.

Mini Poppet Folklore

Everyone knows poppets are mischievous little critters. At the best of times, they are hiding buttons, yarn needles, crochet hooks, you name it! And cramming all of that sassy character into such a tiny key chain amplifies the attitude! It is said that mini poppets are collectors of luck and, by carrying one with you wherever you go, they will collect that luck and keep it safe, just for you. One thing is absolutely certain: they love going on adventures with their humans!

Want an Ad-Free Version?

Click here to purchase a PDF download of this pattern from my Etsy shop.

Otherwise, keep scrolling for the free pattern!

This little guy is sure to make for an adorable accessory to your key chain or bags. They also make cute and fun gifts! Please share your finished poppets with me here on Instagram. I love to see them!

Easy Crochet Keychain for Beginners

Materials Needed

  • 2 mm crochet hook
  • Fingering weight (#1) yarn
  • Safety eye (or button)
  • Sewing needle
  • Black embroidery thread
  • Colored embroidery thread
  • Key chain hardware
  • Yarn needle
  • Stitch marker
  • Polyester fiberfill
  • Scissors

Crochet Abbreviations

  • MR- Magic Ring
  • Inc- Increase
  • Dec- Decrease
  • Ch- Chain
  • Sc- Single Crochet
  • Dc- Double Crochet
  • St(s)- Stitch(es)
  • Sl st- Slip Stitch
  • Rnd(s)- Round(s)
  • Hdc- Half Double Crochet
  • BLO- Back Loop Only
  • FLO- Front Loop Only
  • FO- Fasten Off

*PLEASE NOTE*

This pattern and pictures are for personal use only. Please do not share, distribute, reproduce, publish, translate, alter, or resell this pattern in any way. You may sell the finished product as long as you credit my design.

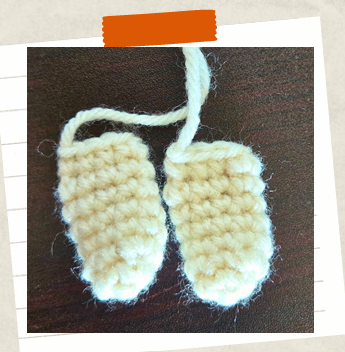
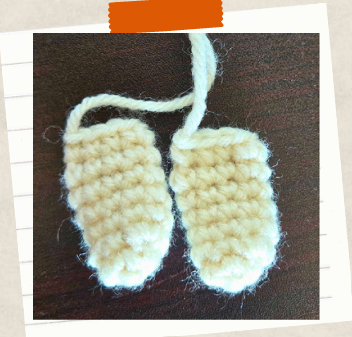
Arms (Make 2)

With a 2 mm hook and fingering weight (#1) yarn in any color you choose for the arms:
1. MR 6(6)
2. I sc, inc x 3(9)
3-7. Sc around(9)
* Pinch closed, sc across the top to close (3)
*FO.
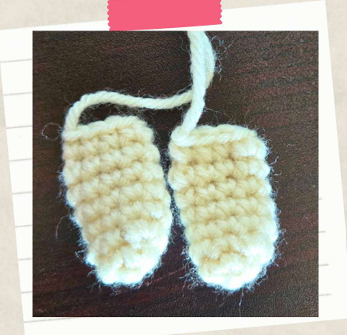
Crochet keychain tutorial showing how to make the arms of a mini amigurumi doll.

Keychain Poppet Fun Fact #1:

They are fiercely loyal companions. Once attached to a keyring, backpack, or purse, they consider it their sacred duty to accompany their human on every adventure!

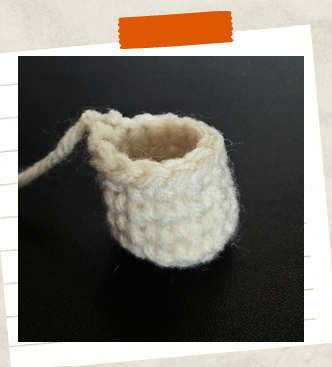
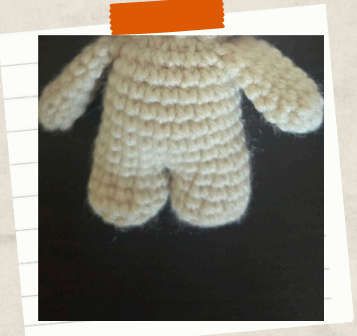
Legs and Body

With a 2 mm hook and fingering weight (#1) size yarn in any color you choose for the legs and body:
1. MR 6(6)
2. Inc x 6(12)
3. BLO: Sc around(12)
4-6. Sc around
*FO after the first leg. Do not fasten off after 2nd leg, but continue below:
(12)
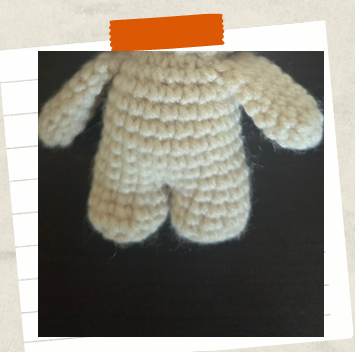
7. Join to 1st leg with a sc. 11 more sc around 1st leg. 12 sc around 2nd leg.(24)
8-12. Sc around
*Start stuffing. Stuff as you go.
(24)
In R 13, we are going to attach the arms.
13. 4 sc, 4 sc crocheting through both the stitches in Arm 1 and the body, 8 sc in the body only, 4 sc crocheting through both the stitches in Arm 2 and the body, 4 sc(24)
14. Dec x 12(12)
15. Inc x 12(24)
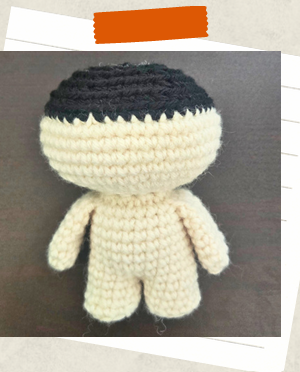
16. 1 sc, inc x 12(36)
17-20. Sc around(36)
21. 4 sc, dec x 6(30)
22. 3 sc, dec x 6
*Begin stuffing head firmly. Keep stuffing as you close.
(24)
23. 2 sc, dec x 6(18)
24. 1 sc, dec x 6(12)
25. dec x 6
*FO, leaving a long tail. Pass the tail through each of the remaining 6 sts using a yarn needle. Pull tight to close, weave in end.
(6)
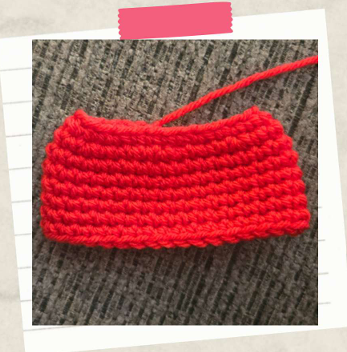
Easy amigurumi keychain pattern showing crocheted leg before assembly.
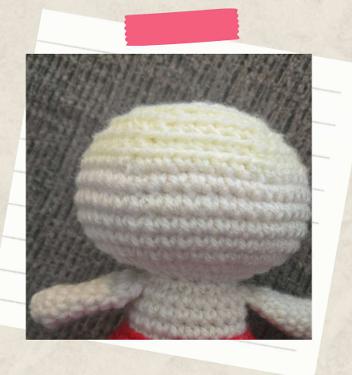
Crochet keychain tutorial showing how to make the head of a mini amigurumi doll.
Step-by-step beginner crochet keychain pattern demonstrating body construction.

Keychain Poppet Fun Fact #2:

They collect tiny bits of luck. Keychain poppets are said to gather lost luck they find along their travels and secretly tuck it into their stitches for safekeeping.

Eye Details

With embroidery thread in your choice of color and a sewing needle:
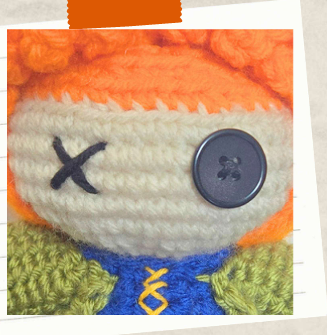
Embroider an “X” about 4 sts to the left of the safety eye or button.
crochet keychain tutorial showing embroidered X for one eye and a safety eye for the other.

Finishing Details

With embroidery thread in your choice of color and a sewing needle:
Embroider decorative stitches across the body anywhere you like! The more the merrier, and the more crooked, the better!
easy crochet keychain for beginners showing decorative stitches embroidered into the body.

Add the Key Chain

Add the key chain to your tiny poppet by connecting the ring to the stitches at the top of the poppet’s head.
Experiment with different placements too! Maybe try one hanging from the hand!
crochet keychain hardware used for the beginner friendly crochet keychain
a photo showing an easy clipping of key chain hardware to a crochet keychain

All Done!

And that’s it!

Your poppet key chain is done and ready to be clipped to your keys, bag, or purse to accompany you on all your adventures!

The sky is the limit with this little amigurumi keychain. Try different colors, button eyes, different colored stitches, etc!

When you’re done adding all the cute and fabulous flair to your poppet, you’re all done!

Key Chain Poppet Fun Fact #3:

They trade stories with other travelling poppets. Whenever two keychain poppets cross paths, they exchange tales of road trips, grocery store adventures, and mysterious items found at the bottom of handbags. 👀

Mini crochet keychain attached to crochet bag showing finished beginner amigurumi project.
Handmade crochet doll keychain hanging from a backpack zipper as a cute crochet accessory.
Easy crochet keychain for beginners displayed as a purse charm made with scrap yarn.
Colorful crochet keychain doll made from an easy beginner-friendly crochet pattern.

Add a Top Hat!

To add an adorable mini top hat to your crochet keychain, click the link below to follow along with that pattern! Use a 2 mm hook and fingering (#1) weight yarn to keep it sized the same as your crochet keychain.

Tiny Top Hat Fun: Amigurumi Crochet Top Hat Pattern!

And, if you’re looking for more fun patterns to try, take a look below at the Related Posts! You can make a unicorn poppet keychain or even a bear! Just be sure to use the 2 mm and fingering (#1) weight yarn to make them keychain size!

Related Posts:

Free Toadstool Crochet Pattern for a Spooky Cute Toadstool Poppet

Free Valentine’s Bear Crochet Pattern (Cute Amigurumi Bear with Heart)

Adorable No-Sew Crochet Octopus Free Pattern

10 Amazing Patterns for Crochet Bag Charms to Add Instant Charm!

Voodoo Doll Crochet Pattern

Key Chain Poppet Fun Fact #4:

The smaller the poppet, the bigger the personality. Scholars of poppet lore have long observed that key chain sized poppets are often the most mischeivous of all.

So, which keychain poppet is your favorite? Share below!

Stay cozy,

Easy crochet keychain for beginners displayed as a handmade gift idea.

This post was all about a free easy crochet keychain for beginners pattern.

Fun and Easy Crochet Keychain for Beginners (Free Pattern) Read Post »

Free Patterns

Free Toadstool Crochet Pattern for a Spooky Cute Toadstool Poppet

toadstool crochet pattern

If you love whimsical crochet projects, spooky cute aesthetics, and woodland-inspired plushies, you’re going to adore this free toadstool crochet pattern!

This adorable mushroom poppet combines cozy cottagecore charm with fantasy-inspired details to create the perfect little crochet companion. With its oversized mushroom cap, stitched details, and tiny poppet personality, this crochet mushroom plush is a fun project for anyone who loves amigurumi and magical handmade creations.

Whether you’re looking for:

  • a free mushroom crochet pattern
  • a unique cottagecore crochet project
  • a spooky cute plushie pattern
  • or a whimsical woodland crochet doll

this Toadstool Poppet is ready to move into your yarn stash.

Legend says Toadstool Poppets quietly appear in cozy craft rooms where creativity thrives. They are known to guard yarn stashes, collect lost buttons, and encourage late-night crochet sessions beside flickering fairy lights.

Why You’ll Love This Free Toadstool Crochet Pattern

This crochet mushroom plush pattern is:

  • beginner-friendly
  • quick to make
  • customizable with different yarn colors
  • perfect for cottagecore decor
  • ideal for fantasy and spooky cute aesthetics
  • adorable for gifts, markets, and desk companions

You can make your Toadstool Poppet in classic woodland reds, soft pastel fairycore colors, spooky gothic tones, or cozy autumn neutrals.

The free mushroom crochet pattern works up into the perfect collectible plush for fantasy lovers, cottagecore decor enthusiasts, and spooky cute crochet fans alike. The soft rounded shape and oversized mushroom cap make this woodland-inspired crochet plush especially fun to customize!

Do You Want an Ad-Free Version?

Click here to purchase a downloadable PDF version of this pattern!

And now, let’s get right down to it.

Free Toadstool Crochet Pattern

Materials Needed

To make this crochet toadstool poppet, you’ll need:

  • 3.5 mm crochet hook
  • Worsted weight (#4) yarn in white, cream, red, and black (or any colors you choose)
  • 12 mm button
  • Sewing needle
  • Embroidery thread in black and/or a variety of colors
  • Jute twine (optional)
  • Scrap fabric (optional)
  • Felt (optional)
  • Fabric glue (optional)
  • Yarn needle
  • Stitch marker
  • Polyester fiberfill
  • Scissors

Crochet Abbreviations

  • MR- Magic Ring
  • Inc- Increase
  • Dec- Decrease
  • Ch- Chain
  • Sc- Single Crochet
  • Dc- Double Crochet
  • St(s)- Stitch(es)
  • Sl st- Slip Stitch
  • Rnd(s)- Round(s)
  • Hdc- Half Double Crochet
  • BLO- Back Loop Only
  • FLO- Front Loop Only

* Please Note: this pattern and pictures are for personal use only. Please do not share, distribute, reproduce, publish, translate, alter, or resell this pattern in any way. You may sell the finished product as long as you credit my design.

Legs and Body

With a 3.5 mm hook and worsted weight (#4) yarn in cream:
1. MR 6(6)
2. Inc x 6(12)
3. BLO: Sc around(12)
4-6. Sc around(12)
*Fasten off first leg. Do not fasten off 2nd leg, but continue below:
7. Join to 1st leg with a sc. Add 11 more sc around 1st leg. 12 sc around 2nd leg.(24)
8-14. Sc around
*Stuff as you go.
(24)
15. Dec x 12(12)
16. Inc x 12(24)
17. 1 sc, inc x 12(36)
18. 2 sc, inc x 12(48)
19-23. Sc around(48)
24. 6 sc, dec x 6(42)
25. 5 sc, dec x 6(36)
26. 4 sc, dec x 6(30)
27. 3 sc, dec x 6
*Keep stuffing as you close.
(24)
28. 2 sc, dec x 6(18)
29. 1 sc, dec x 6(12)
30. Dec x 6(6)
*FO. Weave in ends.
a crocheted leg for a toadstool crochet pattern
a crocheted body that begins a toadstool crochet pattern

Arms (Make 2)

With a 3.5 mm hook and worsted weight (#4) yarn in cream:
1. MR 6(6)
2. 1 sc, inc x 3(9)
3-7. Sc around(9)
*Pinch closed, sc across the top to close.
*FO, leaving a long tail for sewing.
*Sew to body just below the neck on R13.
a crocheted arm for a toadstool crochet pattern

Toadstool Cap Top

With a 3.5 mm hook and worsted weight (#4) yarn in red (or whichever color you choose for the cap):
1. MR 6(6)
2. Inc x 6(12)
3. 1 sc, inc x 6(18)
4. 2 sc, inc x 6(24)
5. 3 sc, inc x 6(30)
6. 4 sc, inc x 6(36)
7. 5 sc, inc x 6(42)
8. 6 sc, inc x 6(48)
9. 7 sc, inc x 6(54)
10. 8 sc, inc x 6(60)
11-13. Sc around
*FO, leave long tail for sewing.
(60)
a toadstool top for a toadstool crochet pattern

Toadstool Cap Bottom

With a 3.5 mm hook and worsted weight (#4) yarn in white (or whichever color you choose for the cap bottom):
1. Repeat steps for Toadstool Cap.
2. Sew Toadstool Cap Bottom to Toadstool Cap Top.
Add some stuffing to shape if desired.
*Weave in all ends.
a toadstool cap bottom sewn to a toadstool cap top

Toadstool Spots

With a 3.5 mm hook and worsted weight (#4) yarn in white, make as many of each size spots below as desired:
Large:
1. MR 6(6)
2. Inc x 6(12)
3. 1 sc, inc x 6
*Sl st to beginning st. FO, leaving a long tail for sewing.
(18)
Medium:
1. MR 6(6)
2. Inc x 6
*Sl st to beginning st. FO, leaving a long tail for sewing.
(12)
Small:
1. MR 6(6)
*Sl st to beginning st. FO, leaving a long tail for sewing.
*Sew or glue your spots onto the Toadstool Cap Top.
a toadstool cap for a toadstool crochet doll

Eyes

*With embroidery thread and a sewing needle, sew a button to the poppet’s face 1-2 rounds below the edge of the Toadstool Cap.
*With worsted weight (#4) yarn in black or embroidery thread, embroider an X a few stitches to the right of the button.
embroidered X eye and button eye on a toadstool crochet doll

Finishing Details

*With a sewing needle and some black embroidery thread:
*Embroider a mouth 1 row below the eyes and 4 stitches across.
With colored embroidery thread, add some decorative stitches on the arms, belly, legs, etc. Anywhere you want!
Use jute twine to tie bows or embroider stitches into your poppet if desired.
Cut out a small piece of scrap fabric and glue to the toadstool’s chest. Glue a felt heart over the patch of fabric.
Add some blush to the cheeks if desired, and your toadstool poppet is all done!
decorative patch on a mushroom crochet doll
embroidered face details on a crochet toadstool doll including an X and a button eye
finished crochet toadstool doll

Plushy Version!

This poppet also makes an adorable plushy version using plush yarn! To do this, follow the above steps, but use a size 6 mm hook and size 5 (super bulky) yarn!
Instead of using a button, you can crochet one for your plushy. Follow these instructions:
1. MR 6 (6)
2. 1 sc, inc x 3, sl st to beginning st. (9)
*FO, leaving a long tail for sewing.
Embroider an X into the center to make it look more like a button, then sew it to the face.
Embroidered facial details on a plushy crochet mushroom doll
plushy crochet mushroom amigurumi doll

Toadstool Poppet Lore

Toadstool Poppets are tiny woodland guardians believed to sprout wherever creativity gathers.

They are known for:

  • hiding stitch markers
  • collecting shiny buttons
  • untangling yarn while nobody is looking
  • curling up beside half-finished crochet projects
  • protecting cozy craft rooms from bad creative energy

Some people believe a Toadstool Poppet’s mushroom cap glows brighter when it feels especially loved.

If You Liked This Pattern…

Take a look at some other cute poppet patterns!

Free Valentine’s Bear Crochet Pattern (Cute Amigurumi Bear With Heart)

Voodoo Doll Crochet Pattern

Share the Love!

If you made an adorable Toadstool Poppet, I would love to see them! Please share them with me on Instagram.

Bumble Bits and Bobs (@bumblebitsandbobs)

Please feel free to reach out to me with any questions regarding this pattern as well.

Oh! And stay cozy,

a mushroom amigurumi crochet doll

Free Toadstool Crochet Pattern for a Spooky Cute Toadstool Poppet Read Post »

valentinesbearcrochet
Free Patterns

Free Valentine’s Bear Crochet Pattern (Cute Amigurumi Bear with Heart)

valentinesbearcrochetpattern

Looking for a sweet and cozy Valentine’s crochet project? This free Valentine’s bear crochet pattern is perfect for handmade gifts, heartfelt keepsakes, or simply stitching something full of fun and love.

Some projects just feel extra magical. This Valentine’s bear crochet poppet pulled at my heart strings, begging me to come to life. With Valentine’s Day right around the corner, this little guy was the perfect next addition to the poppet family. So, meet the Valentine’s Bear Poppet! A tiny amigurumi bear designed to hold a little crochet heart and guard all your softest intentions. He’s palm-sized, beginner-friendly, and just mischievous enough to make late-night crochet sessions feel magical.

Legend says Valentine’s Bear Poppets appear when yarn is stitched with affection… and maybe a little nervous excitement. If you’ve been feeling the urge to crochet hearts lately, this might be why!

The Valentine’s Bear Poppet is a small amigurumi bear crochet pattern designed especially for Valentine’s Day. With his sweet expression and tiny heart accessory, he makes a thoughtful handmade gift or a charming decoration for February.

Valentine’s Bear Poppets are known for a few things:

  • Fiercely guarding crocheted hearts
  • Sitting on unfinished projects to “keep them safe”
  • Getting emotionally attached to their maker
  • Believing Valentine’s Day lasts all year

This bear fits perfectly in the palm of your hand and works up quickly, making it ideal for gifting or crafting multiple bears for friends and loved ones.

This Valentine crochet pattern is suitable for confident beginners who are comfortable with basic stitches and simple shaping.

Skill Level: Confident beginner/ advanced beginner

Techniques Used:

  • Magic ring
  • Single crochet
  • Increases and decreases
  • Simple assembly

📍Valentine’s Bear Poppet Fun Fact: they are very patient with beginners!

If you’d like a printable, ad-free PDF with clear formatting, you can grab the full pattern on Etsy.

The PDF is perfect for:

  • Offline crafting
  • No ads!
  • Keeping your poppet happy with a smoother crafting experience

👉 Find the Valentine’s Bear Poppet PDF pattern in my Etsy shop here!

To make your Valentine’s Bear Poppet, you’ll need:

  • Worsted weight yarn
  • 3.5 mm crochet hook
  • 12 mm button
  • Black embroidery thread
  • Sewing needle
  • White embroidery thread
  • Safety nose
  • Yarn needle
  • Stitch marker
  • Fiberfill stuffing
  • Scissors
  • Optional: Decorative pin for heart

📍Valentine’s Bear Poppet Fun Fact: they prefer soft yarn and are not shy about expressing disappointment over scratchy choices.

Your finished bear will be palm-sized, depending on yarn choice and tension. This makes it perfect for:

  • Valentine’s Day gifts
  • Stocking stuffers
  • Little keepsakes
  • Cozy shelf or desk decor

If you’d like to make larger or smaller crocheted bears, feel free to change out the hook size and/or yarn size! These poppets would be adorable in any size.

  • MR- Magic Ring
  • Inc- Increase
  • Dec- Decrease
  • Ch- Chain
  • Sc- Single Crochet
  • Dc- Double Crochet
  • St(s)- Stitch(es)
  • Sl st- Slip Stitch
  • Rnd(s)- Round(s)
  • Hdc- Half Double Crochet
  • BLO- Back Loop Only
  • FLO- Front Loop Only

And now, let’s get to the free Valentine’s Bear crochet pattern! Feel free to adjust colors, add accessories and stitching, whatever! Let your poppet guide you as you bring him or her to life.

1. MR 6(6)
2. Inc x 6(12)
3-5. Sc around(12)
*Fasten off first leg. Do not fasten off 2nd leg, but continue below:
6. Join to 1st leg with a sc, sc 11 more times around 1st leg, 12 sc around 2nd leg(24)
7-13. Sc around(24)
14. Dec x 12(12)
15. Inc x 12(24)
16. 1 sc, inc x 12(36)
17-21. Sc around(36)
22. 4 sc, dec x 6(30)
23. 3 sc, dec x 6(24)
*Sew an X across Rows 21 & 20, about 2 stitches wide using black worsted weight yarn.
*Sew button 4 stitches to the right of the X with sewing needle.
24. 2 sc, dec x 6(18)
25. 1 sc, dec x 6(12)
26. Dec x 6(6)
*FO, weave in ends.

valentine bear crochet pattern free
crochet bear with heart free pattern
1. MR 6(6)
2. Inc x 6(12)
3. inc, 5 sc, inc, 5 sc(14)
4. Sc around(14)
*FO. Leave a long tail for sewing.
*Insert safety nose centered in Round 2.
*Sew muzzle to face, centered one round below the eyes. Stuff muzzle as you sew it on.
teddy bear crochet pattern free
1. MR 6(6)
*FO without joining.
*Leave a long tail for sewing.
*Sew to top of head between Rounds 2-4 on each side.
easy valentine bear crochet pattern free
1. MR 6(6)
2. 1 sc, inc x 3(9)
3-8. Sc around(9)
*Stuff lightly.
*FO, leave a long tail for sewing.
*Sew to Round 13 of body.
Valentine bear crochet pattern free for beginners
Simple valentine bear crochet pattern free
In red or any color you choose for the heart:
Heart Top 1:
1. MR 6(6)
2. Inc x 6(12)
3. Sc around.(12)
*FO first heart top. Do not fasten off after 2nd heart top.
Heart Top 2:
1. MR 6(6)
2. Inc x 6(12)
3. 1 sc, inc x 6(18)
4-5. Sc around(18)
6. Join to 1st heart top with a sc. Sc 11 more times around 1st heart top. 18 sc around 2nd heart top.(30)
7. Sc around(30)
*Stuff heart tops, continue to stuff heart as you go.
8. 3 sc, dec x 6(24)
9. Sc around(24)
10. 2 sc, dec x 6(18)
11. Sc around(18)
12. 1 sc, dec x 6(12)
13. Sc around(12)
14. Dec x 6(6)
*FO, leaving a long tail for sewing. Using a yarn needle, pass the yarn tail through each of the remaining 6 stitches. Pull tight to close.
*Add some embroidered stitches in white or any color you choose to complete your heart.
*Optional: Add a decorative pin to the heart for a cute and witchy vibe!
*Sew heart to the bear’s paws to make him hold the heart in place.
easy valentine bear pattern free

And that’s it! Your Valentine’s Bear Poppet is ready to meet the world!

If you enjoyed this free Valentine crochet pattern, don’t forget to save it for later or share it with fellow crocheters!

📌 Pin this pattern on Pinterest

📸 Tag me on Instagram @bumblebitsandbobs when you make your bear!

📍Valentine’s Bear Poppet Fun Fact: they love being photographed. It’s how they announce themselves to the world!

Whether you’re crocheting this bear for someone special or just for yourself, the Valentine’s Bear Poppet is a reminder that handmade gifts carry extra meaning.

If you suddenly feel inspired to crochet more hearts…

Your Bear Poppet may already be nearby. 💕

As always, stay cozy!

This post included a free Valentine’s Bear crochet pattern.

free valentine's bear crochet pattern

Free Valentine’s Bear Crochet Pattern (Cute Amigurumi Bear with Heart) Read Post »

Free Patterns

Crochet Christmas Ornaments Snowman Pattern – Easy, Quick & Adorable Holiday Crochet Decor

crochet christmas ornaments snowman

Looking for the perfect handmade touch for your Christmas tree this year? This free crochet snowman Christmas ornament pattern is a quick, beginner-friendly project that’s as fun to make as it is to display. Whether you’re crafting for your own holiday decor, gifting to friends, or selling at winter markets, this crochet Christmas ornament snowman pattern brings cozy charm and a dash of whimsy to your season.

This tutorial will walk you step-by-step through how to crochet a snowman ornament, including materials, stitches, and helpful tips. Plus, you can download the PDF version from my Etsy shop here or my Ravelry shop here if you prefer an ad-free, printable version. Happy wishes and cozy stitches!

Please note that these patterns and pictures are for PERSONAL USE only. Please do not share, distribute, reproduce, publish, alter, translate, or resell this pattern in any way. Feel free to share or sell the finished product as long as you credit my design. Please share photos of your completed ornaments with me by tagging me here on Instagram if you’d like. I love to see them!

  • 6 mm crochet hook
  • 4 mm crochet hook
  • Super bulky yarn (#6) in white
  • Worsted weight (#4) yarn in red and orange
  • 14 mm safety eyes
  • Yarn needle
  • Stitch marker
  • Polyester fiberfill
  • Scissors
  • MR- Magic Ring
  • Inc- Increase
  • Dec- Decrease
  • Ch- Chain
  • Sc- Single Crochet
  • Dc- Double Crochet
  • St(s)- Stitch(es)
  • Sl st- Slip Stitch
  • Rnd(s)- Round(s)
  • Hdc- Half Double Crochet
  • BLO- Back Loop Only
  • FLO- Front Loop Only
With 6 mm hook in white #6 super bulky yarn:
1. MR 8(8)
2. Inc x 8(16)
3. 1 sc, inc x 8(24)
4. 3 sc, inc x 6(30)
5-9. Sc around(30)
10. 3 sc, dec x 6(24)
* Place safety eyes between Rds 7-8, about 5 sts apart.
* Start stuffing, continue to stuff as you close.
11. 2 sc, dec x 6(18)
17. 1 sc, dec x 6(12)
18. dec x 6(6)
* FO, leaving a long tail. Weave tail through the 6 remaining sts. Pull tight to close. Weave in ends.
crochet christmas ornaments patterns
With worsted weight (#4) yarn in orange and a 4 mm hook:
1. MR 4(4)
2. 1 sc, inc x 2(6)
3-4. Sc around(6)
5. 1 sc, inc x 3(9)
6. Sc around(9)
* FO. Leave a long tail for sewing to head.
* Sew to head between the eyes and one row below.
crochet christmas ornaments gifts
With worsted weight (#4) yarn in red and a 4 mm hook:
1. Ch 20, sc back down the ch, ch 1, turn(19)
2. BLO: Sc in each st, ch 1, turn(19)
3. Repeat row 2 until you have 31 rows OR until the hat reaches all the way around the head with the ribbing vertical (see photo).(19)
4. Join to Row 1 and sc all the way down.
* FO, leaving a long tail.
(19)
5. Weave tail in and out of each of the stitches all the way around the top edge (see photo).
* Pull tight to close hat. Weave in ends.
(9)
6. Fold open end up to create a brim for the hat.
* Put hat on the snowman and sew to the head.
7. Attach red yarn to the top center of the hat with a sl st. Ch 13, sl st in same st on hat.
* FO, weave in ends.
crochet christmas ornaments free pattern
crochet christmas ornaments ball
crochet christmas ornaments balls
crochet christmas ornaments easy

And that’s it!

I hope you enjoy making this little snowman as much as I did! It’s a fast, fun, and festive project that adds handmade warmth to any space.

If you try this crochet Christmas ornaments snowman pattern, don’t forget to tag me on Instagram @bumblebitsandbobs and share your creations — I’d love to see your snowy friends! ❄️

And stay cozy,

crochet christmas ornaments free

Crochet Christmas Ornaments Snowman Pattern – Easy, Quick & Adorable Holiday Crochet Decor Read Post »

Free Patterns

Adorable No-Sew Crochet Octopus Free Pattern

free octopus crochet pattern amigurumi

Meet Your New Favorite Amigurumi: The Free Crochet Octopus Pattern!

Are you ready to crochet something squishy and adorable? The ocean’s cutest creature is now in yarn form! Welcome to this week’s free crochet pattern– the No-Sew Octopus! As promised, this crochet pattern is completely no-sew, meaning all the pieces are attached as you crochet the main body! That means this crochet pattern works up quickly, making it a perfect gift idea or craft market addition. Let’s get started! Happy wishes and cozy stitches!

Please note that these patterns and pictures are for PERSONAL USE only. Please do not share, distribute, reproduce, publish, alter, translate, or resell this pattern in any way. Feel free to share or sell the finished product as long as you credit my design. Please share photos of your completed octopus with me by tagging me here on Instagram if you’d like. I love to see them!

This post features a free crochet octopus pattern.

Why You’ll Love This Crochet Octopus Pattern

A Perfect Project for Beginners to Crochet Amigurumi

If you are new to crochet or new to crocheting amigurumi, this free crochet octopus pattern is the perfect place to start! It’s a small pattern that works up quickly. If you can create a single crochet and work in the round, you can make this easy, no-sew octopus pattern! Each tentacle is crocheted individually, then attached with the crochet hook as you crochet the body, meaning there are no separate pieces to attach afterward, which can be challenging for new crocheters.

Quick to Make: Your Next Go-To Amigurumi Pattern

Once you get the hang of this easy pattern, you can easily whip up an octopus in less than an hour! Because they work up so quickly, these octopuses are perfect for craft markets or last-minute gift ideas. Need something in just a day or two? No worries! This pattern works up so quickly, you’ll have plenty of time to spare.

Customizable Crochet Octopus for Any Occasion

There are so many ways to make this octopus pattern your very own! Change the colors, try a bulky/plushy yarn, change the safety eyes for something smaller or bigger (or embroider the eyes), etc. The possibilities are absolutely endless to customize your crochet octopus!

Materials You’ll Need for Your Crochet Octopus

  • Crochet hook: 3.75 mm (or whichever size you like best. Keep in mind the size of the finished project will be smaller or bigger depending on the hook you choose.
  • Light purple worsted weight (size 4) yarn
  • Dark purple worsted weight (size 4) yarn
  • Pink worsted weight (size 4) yarn
  • 12 mm safety eyes
  • Yarn needle
  • Stitch marker
  • Polyester fiberfill
  • Scissors

Crochet Abbreviations:

  • MR- Magic Ring
  • Inc- Increase
  • Dec- Decrease
  • Ch- Chain
  • Sc- Single Crochet
  • Dc- Double Crochet
  • St(s)- Stitch(es)
  • Sl st- Slip Stitch
  • Rnd(s)- Round(s)
  • Hdc- Half Double Crochet
  • BLO- Back Loop Only
  • FLO- Front Loop Only
  • FO- Fasten Off

Tentacles (Make 8): Dark Purple

1. Ch 22, sc in 3rd ch from hook (counts as 1st dc)(20)
2. 9 more dc, 5 hdc, 5 sc(20)
3. FO. Weave in ends.
free octopus crochet pattern amigurumi

Head: Light Purple

1. MR 6(6)
2. Inc x 6(12)
3. 1 sc, inc x 6(18)
4. 2 sc, inc x 6(24)
5. 3 sc, inc x 6(30)
6. 4 sc, inc x 6(36)
7. 5 sc, inc x 6(42)
8. 6 sc, inc x 6(48)
9-16. Sc around(48)
17. 6 sc, dec x 6(42)
*Insert safety eyes between Rounds 14-15, 8 sts apart.
18. 5 sc, dec x 6(36)
19. 4 sc, dec x 6(30)
20. 3 sc, dec x 6(24)
free octopus crochet pattern for beginners

In the next Round, we are going to crochet the tentacles to the body as we crochet around. To do this, flip the tentacles so they are facing the wrong side up. We want the wider end with the double crochets attached to the body.

21. Crochet the 8 tentacles around the body with 3 sc per tentacle(24)
free octopus crochet pattern no sew
22. 2 sc, dec x 6(18)
*Stuff firmly
23. 1 sc, dec x 6(12)
24. Dec x 6(6)
*FO, leaving a long tail. Insert tail through each of the 6 sts, and pull tight to close. Weave in end.

Finishing Up: Pink

1. With pink yarn, embroider some blush on the cheeks. Skip a row under the eyes, and embroider a straight line across 2 sts.
crochet tiny octopus free pattern

And there we have it! In no time at all, you’ve made a cute little no-sew octopus! Customize him any way you like with various colors and/or designs! So, have you made this crochet octopus yet? Share below!

And stay cozy,

For more free crochet patterns, browse the patterns below!

Hauntingly Adorable! Your FREE Crochet Halloween Ghost Pattern

Kick Up Some Fun With This Free Crochet Hacky Sack Pattern!

Free Crochet Towel Holder Pattern!

Rustic Crochet Toilet Paper Cover: Free Pattern!

Tiny Top Hat Fun: Amigurumi Crochet Top Hat Pattern!

Crochet Hair Bow Pattern

Crochet Elephant Pattern

Voodoo Doll Crochet Pattern

This post featured a free crochet octopus pattern.

free crochet octopus pattern

Adorable No-Sew Crochet Octopus Free Pattern Read Post »
Scroll to Top