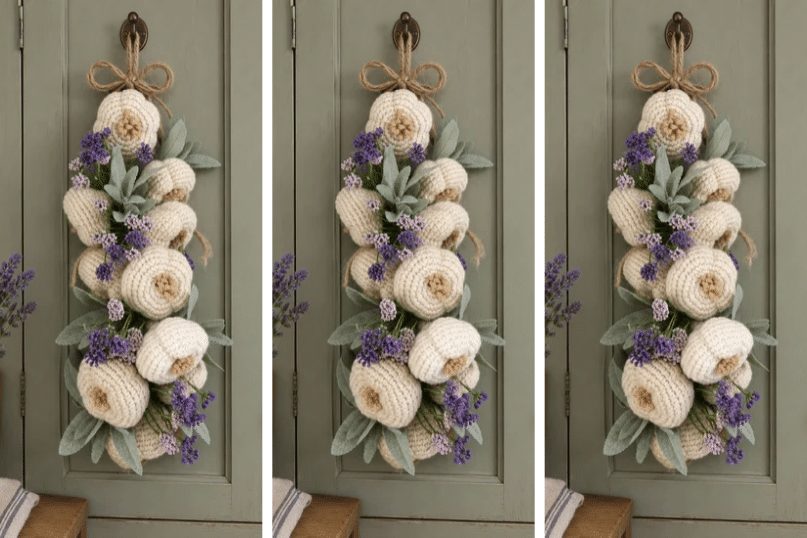
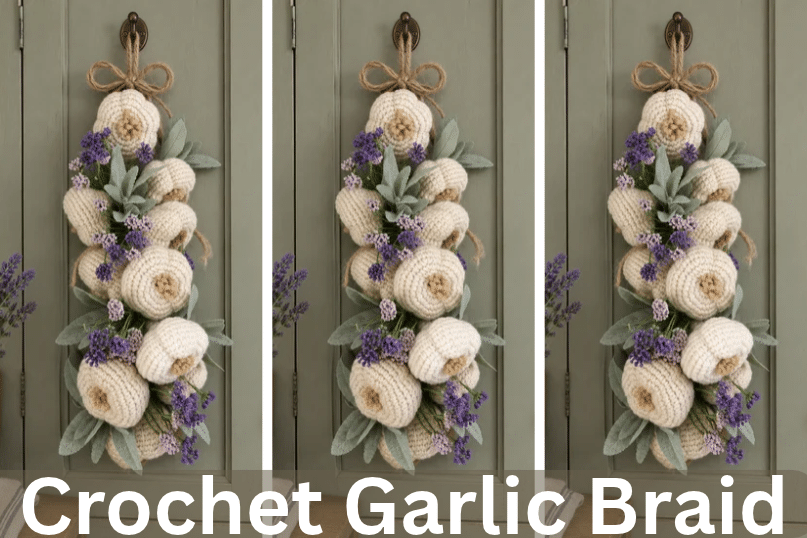
Free Crochet Garlic Braid Pattern: Beautiful Cottage Decor!
Hello, cozy friends! Today, I have a fun crochet decor project for you: a crochet garlic braid!
Recently, as I was in the middle of my annual rewatch of Practical Magic, I couldn’t help but admire their beautiful kitchen. Now, the aesthetic of the Owens witches’ home has always been my dream home! That greenhouse?! To die for.
But, during this watch-through, I happened to notice a glorious garlic braid hanging next to their stove. I absolutely love the simplicity of cottage decor and the rustic charm of a braided bunch of garlic hanging on the wall. I love to braid my own garlic when I grow it in the garden as well. But, it got me thinking…
Why don’t I crochet one?
So, here we are! I’ve created a free crochet pattern so you too can create your very own witchy/cottagecore crochet decor! This beauty can hang on the wall all year round and never wither.
Let’s get started!
Prefer an Ad-Free Version?
You can purchase an ad-free PDF download of this pattern here.
Otherwise, keep scrolling for the free pattern!
Notions
Materials
- 3 mm crochet hook
- Worsted weight (#4) yarn in ivory and light brown
- Jute twine
- Small, clear elastics
- Faux floral picks (optional)
- Hot glue gun (optional)
- Yarn needle
- Stitch marker
- Polyester fiberfill
- Scissors
Crochet Abbreviations
- MR- Magic Ring
- Inc- Increase
- Dec- Decrease
- Ch- Chain
- Sc- Single Crochet
- Dc- Double Crochet
- St(s)- Stitch(es)
- Sl st- Slip Stitch
- Rnd(s)- Round(s)
- Hdc- Half Double Crochet
- BLO- Back Loop Only
- FLO- Front Loop Only
- FO- Fasten Off
- Sk- Skip
*Please Note*
This pattern and pictures are for personal use only. Please do not share, distribute, reproduce, publish, translate, alter, or resell this pattern in any way.
Share Your Finished Crochet Braids With Me!
Please feel free to share your finished crochet garlic braids with me on social media. I love to see them! Tag me on Instagram @bumblebitsandbobs.
Crochet Garlic Braid Pattern
Garlic Bulb
| With a 3 mm hook and worsted weight (#4) yarn in ivory: | |
| 1. MR 8 | (8) |
| 2. Inc x 8 | (16) |
| 3. 1 sc, inc x 8 | (24) |
| 4. 2 sc, inc x 8 | (32) |
| 5. 3 sc, inc x 8 | (40) |
| 6-10. Sc around | (40) |
| 11. 8 sc, dec x 4 | (36) |
| 12. 4 sc, dec x 6 | (30) |
| 13. 3 sc, dec x 6 | (24) |
| 14. 2 sc, dec x 6 *Stuff firmly | (18) |
| 15. Sc around | (18) |
| 16. 1 sc, dec x 6 | (12) |
| 17. Sc around | (12) |
| 18. Dec x 6 | (6) |
| 19. Sc around | (6) |
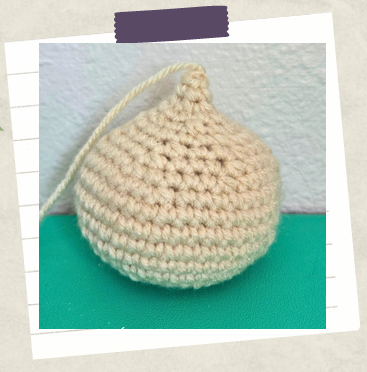
| *FO, leaving a long tail for sewing. | |
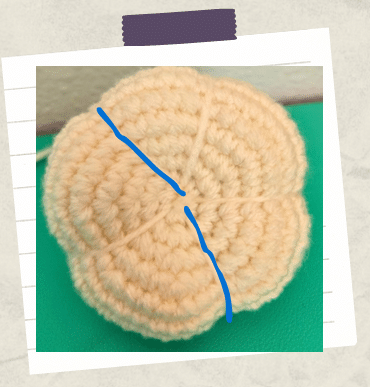
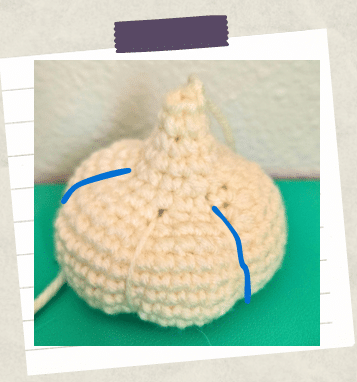
| Cut a long length of ivory yarn. With a yarn needle, pass the yarn up through the center of the bottom of the garlic bulb, coming out about 4 rows down from the top. | |
| Pull the yarn tight and pull it down the side of the garlic bulb, then pass the needle back up through the center of the bottom again. | |
| Pull tight and come up on the 4th row again, 4-5 stitches away from where you came out the first time. | |
| This is creating the “cloves”. Keep pulling tight as you repeat this all the way around. Tie your ends together tightly and tuck the tails into the garlic bulb to finish. | |
| Make as many garlic bulbs as you want to make your garlic braid as long or as short as you’d like. I made 12 for mine. |
Garlic Fun Fact:
Garlic has long been used for protection against illness, thieves, malevolent spirits, and to banish negative energies.
Garlic Fun Fact:
Garlic braids were hung over doorways and windows to bring good fortune to the home and keep away negative intrusions.
Roots
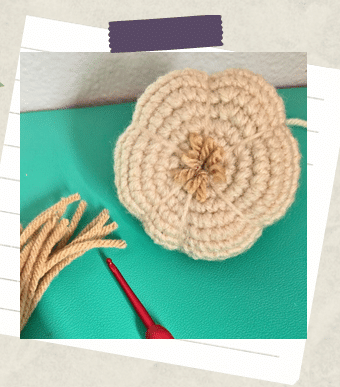
| Cut several strands of light brown yarn that are roughly 5 inches long. |
| Using your crochet hook, attach a strand of yarn around the center ring of the bottom of the garlic bulb using the latch hook method. |
| When you’ve gotten all the way around, trim the strands down to your desired length to create the garlic roots. |
Assembly
| Now, to assemble the garlic braid, I found the easiest solution was to use those small, clear hair elastics you can buy in any drug store. |
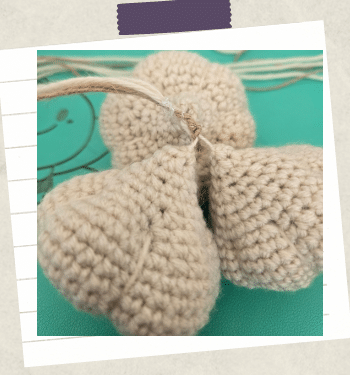
| To begin the braid, gather two or three garlic bulbs and arrange them so they are sitting in a bunch. This will be the bottom of your braid. Fasten them together by tying an elastic around the long tails of the garlic bulbs. |
| To continue up the braid, lay the next garlic bulb slightly above the bunch and fasten. |
| Continue adding one bulb slightly above the previous one until you have them all fastened together. |
| When all the garlic bulbs have been fastened together, tie all the yarn tails in a knot and trim the ends. |
| With a length of jute twine, tie a loop around the yarn tail knot. |
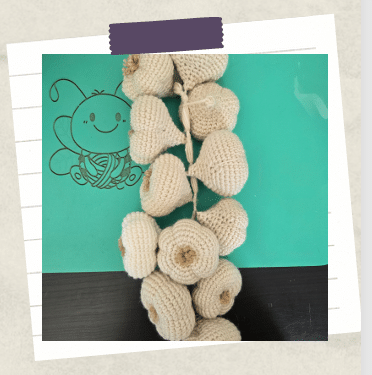
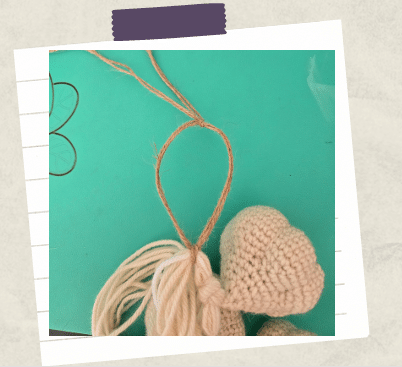
| At this point, I recommend hanging the braid where you want it to be displayed to finish the design. |
| Cut three strands of jute twine and tie a bow at the top of your loop. Cut the tails to your desired length. |
| Now, for the final touches, you can place floral picks in between the garlic bulbs to add a touch of cottage whimsy to your garlic braid! |
| Hot glue the picks in place if desired, or you can just poke them into place while the garlic braid is hanging. Mine have stayed put! |
| And that’s it! Your beautiful garlic braid is complete! |
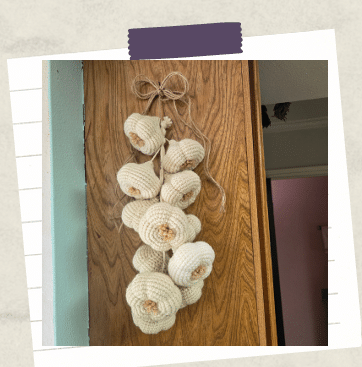
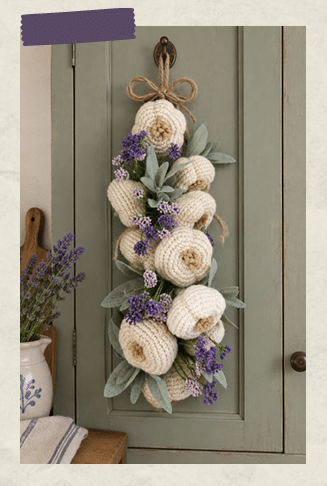
I hope you enjoyed making this beautiful crochet garlic braid! It brings a touch of cottage whimsy and charm to any home. These would make wonderful crochet gifts for any lovers of cottage, farmhouse, or witchy decor.
These crochet garlic braids are completely customizable as well! With the floral picks, you can really create any kind of aesthetic you’d like. Instead of jute twine, you could use ribbon. There is a style out there for every crocheter and every home!
More Crochet Home Decor
Spooktacular Stitches: 20 Free Crochet Halloween Decorations!
Free Crochet Towel Holder Pattern!
Rustic Crochet Toilet Paper Cover: Free Pattern!
11 Cute Patterns for Crochet Kitchen Items
So, what will your crochet garlic braid style look like? Share below!
And stay cozy,